How I Transformed My Concrete Porch with Paint and a Stencil
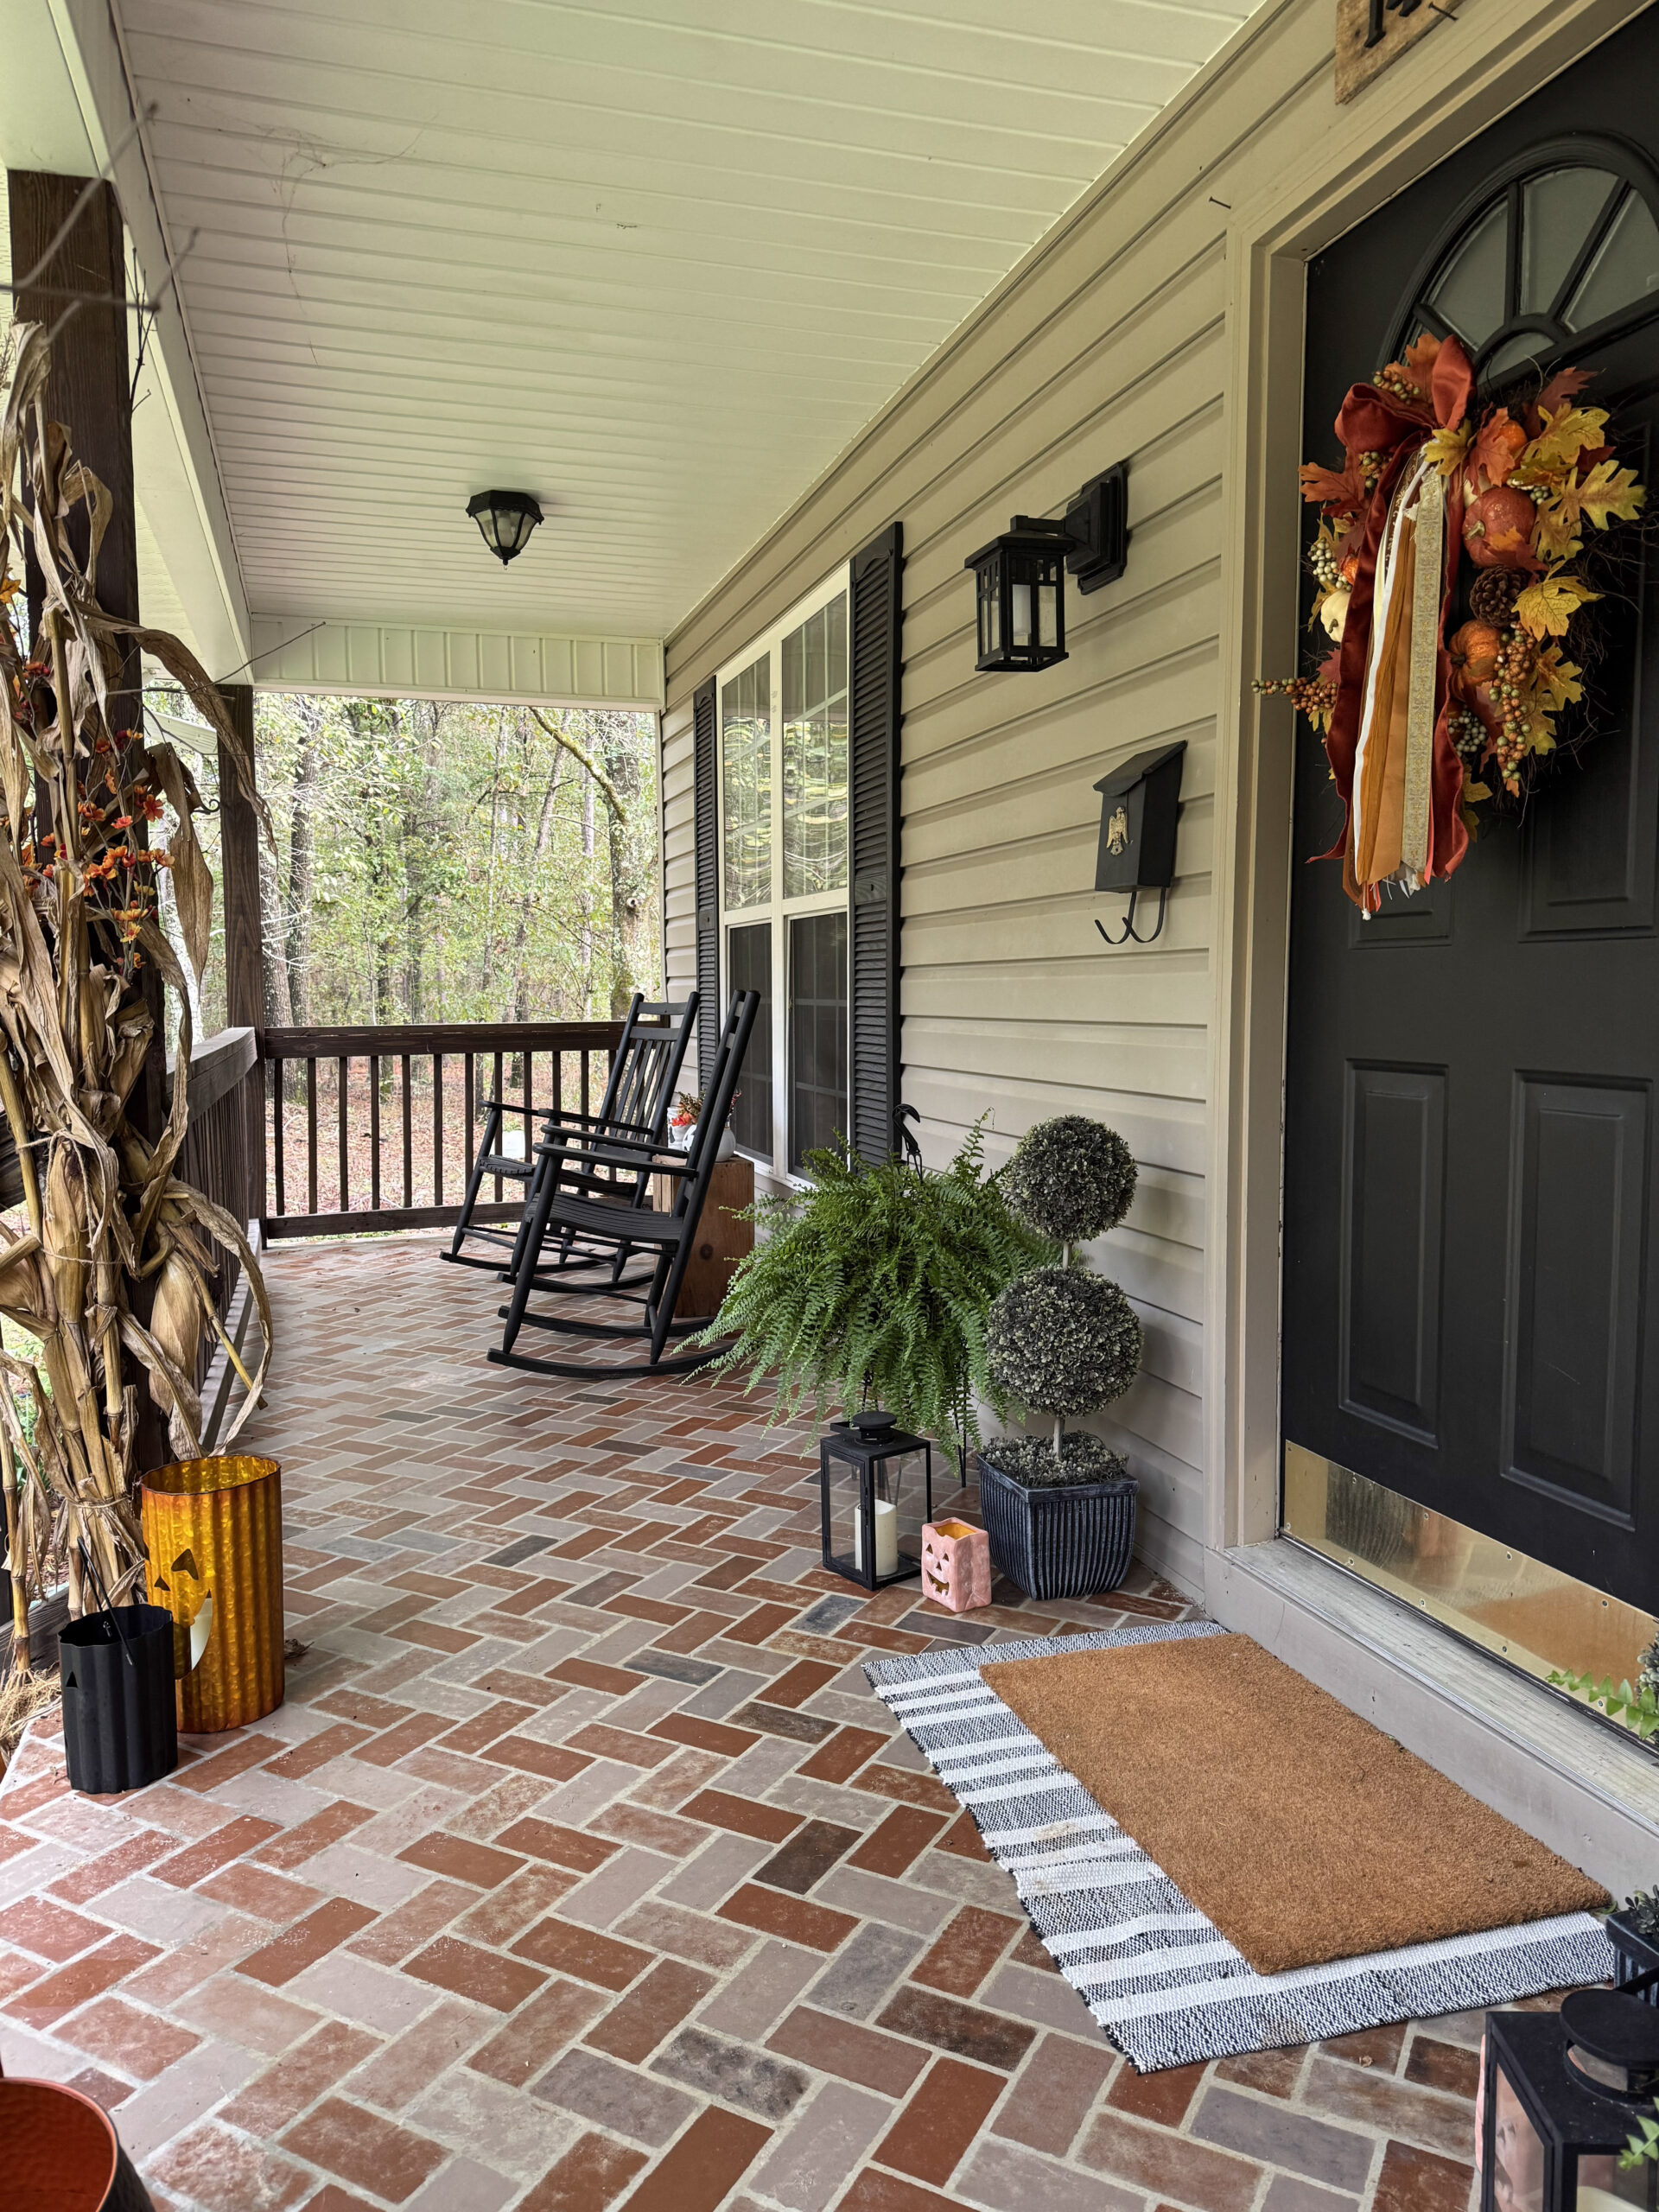
I’ve always loved the look of a beautiful brick porch, but I didn’t love the price tag that can come with creating one.
So I decided to see if I could get the look I wanted with paint and a stencil instead.
And let me tell you…this might be one of my favorite projects yet!
What was once a plain concrete porch now has the look of old brick—and the best part is that I didn’t have to tear anything out or spend a fortune to get it.
If you have a boring concrete porch, patio, or walkway that could use a little personality, this is a DIY project you may want to try.
The Before
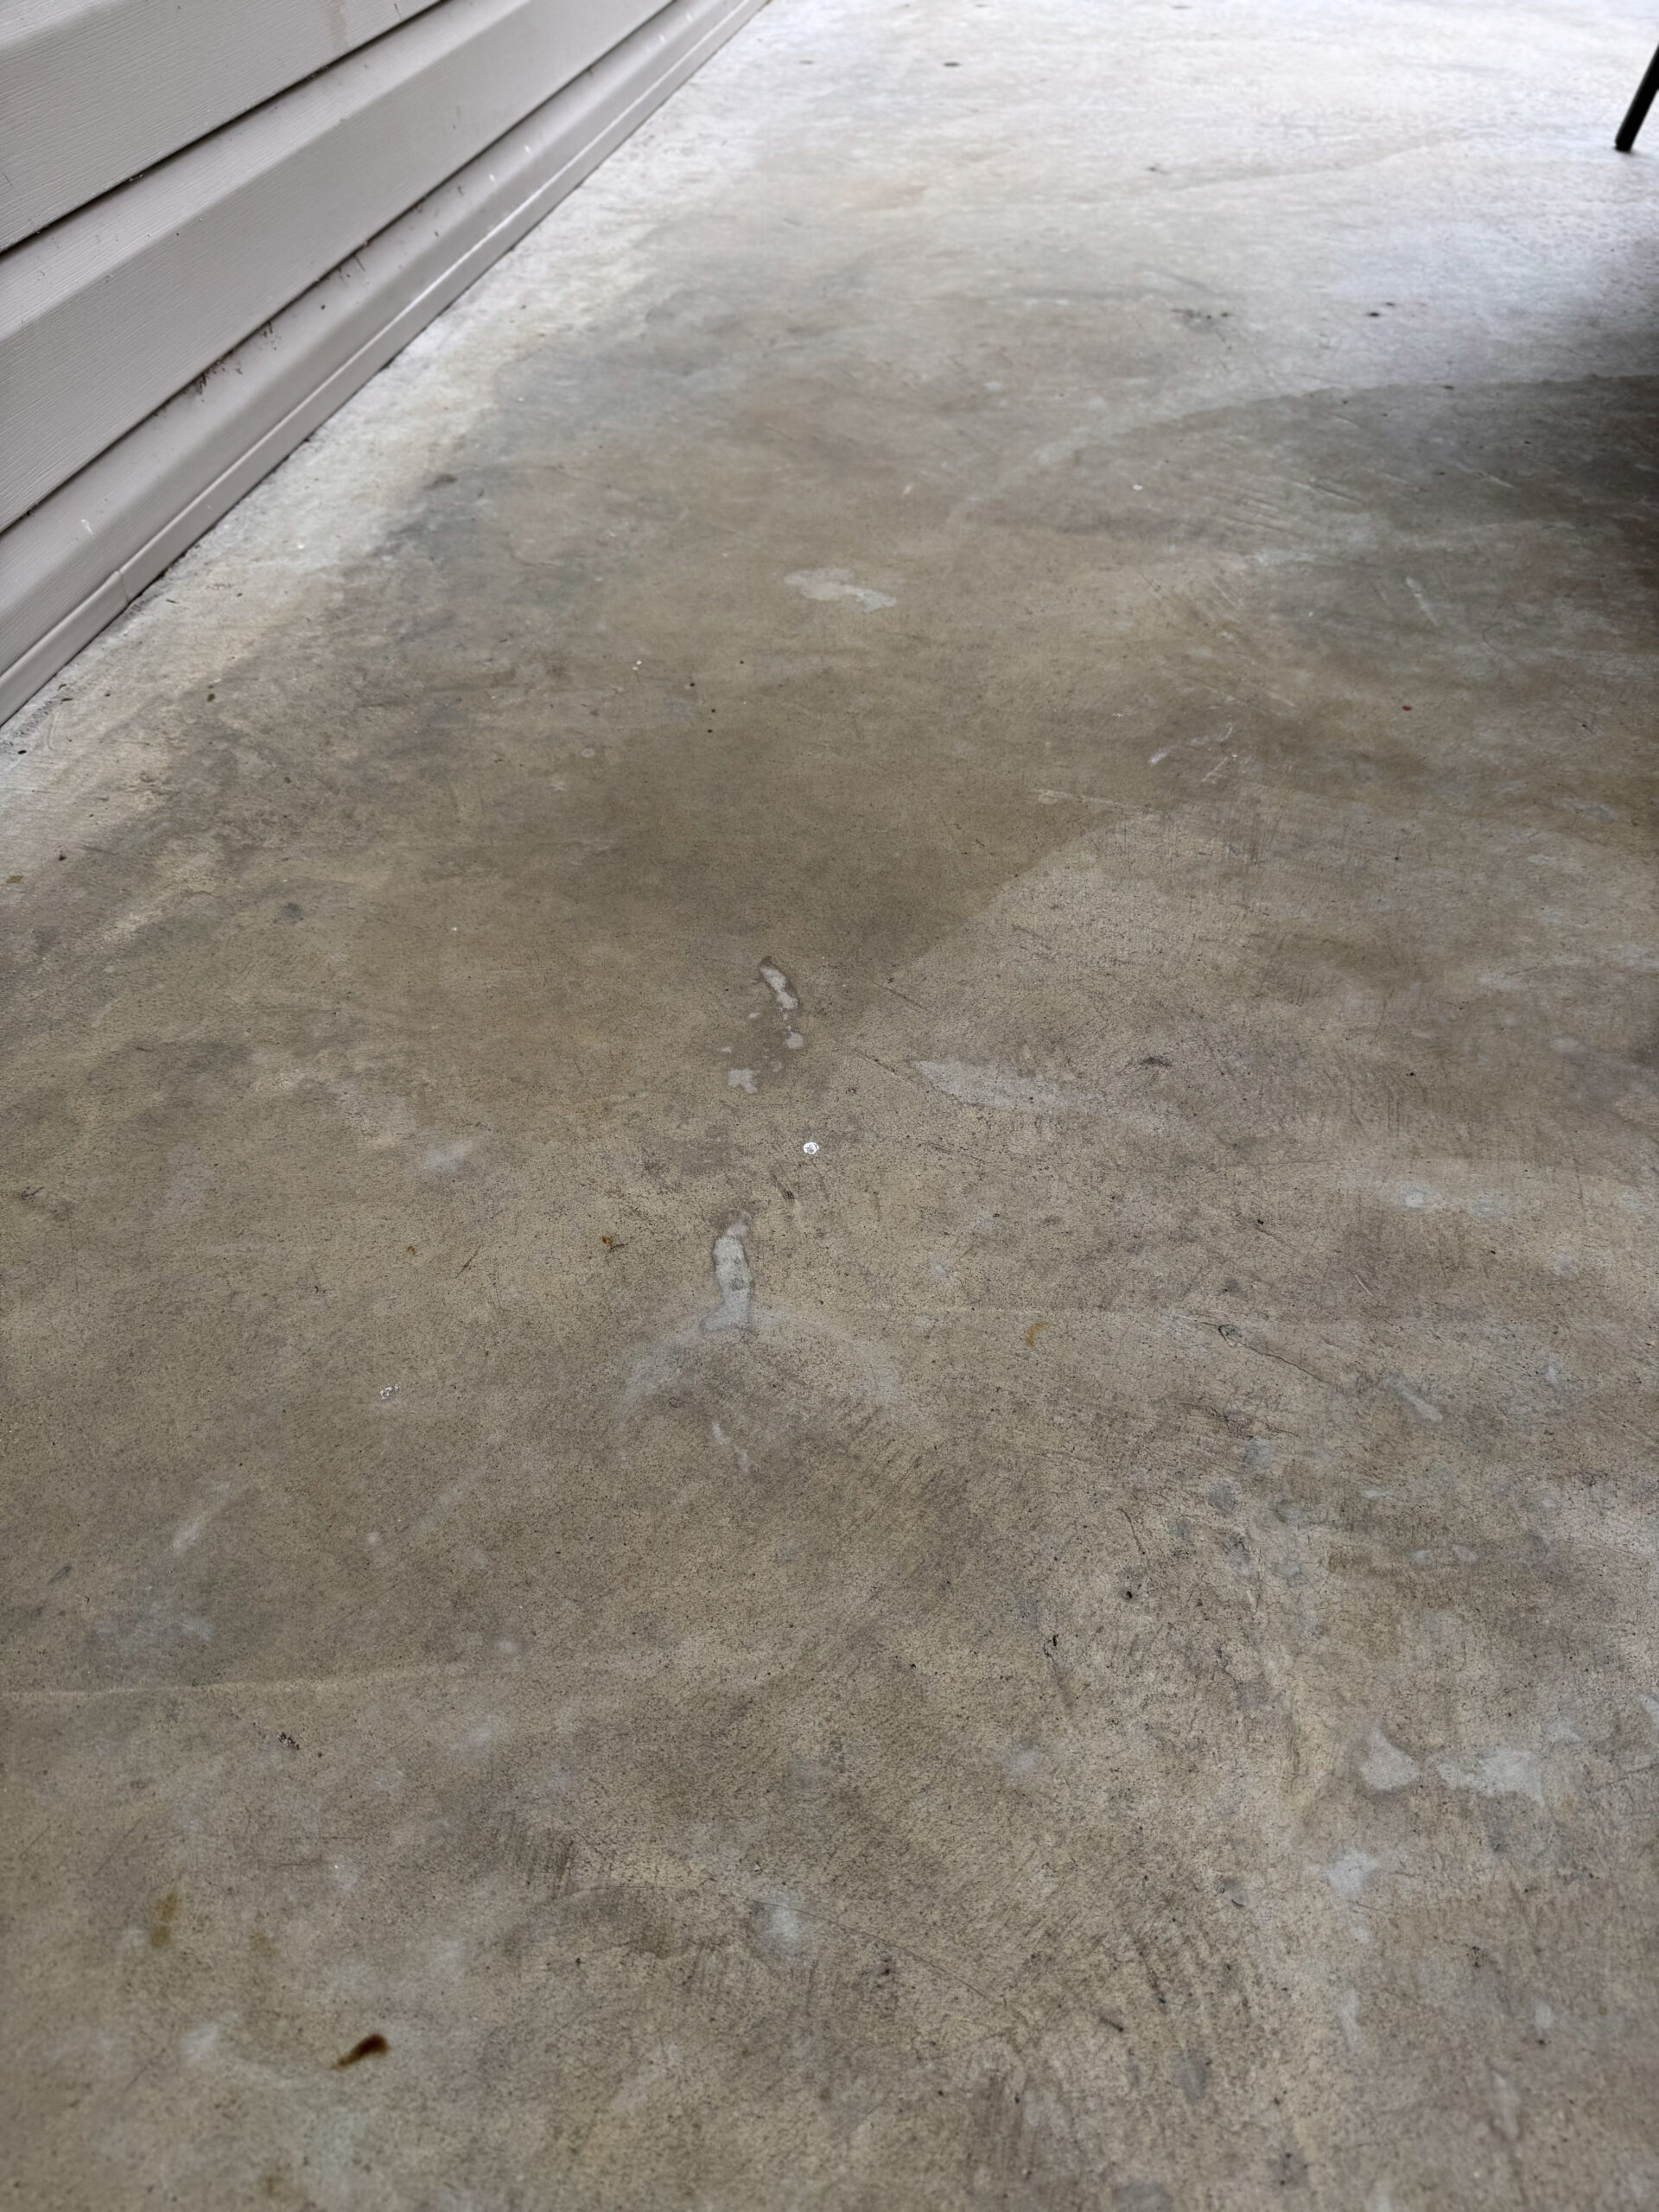
My concrete porch was perfectly functional, but it was also…well, just concrete. And you know how concrete can get as it ages……discolored and stained.
Plus, it didn’t have the character I wanted for the front of our home.
I wanted something that felt a little more charming and welcoming, and I loved the idea of adding the look of brick without the expense and permanence of actually installing brick.
That’s when I decided to try something a little unconventional:
Why not paint it?
What You’ll Need
Here’s what I used for my faux brick porch:
- Paint suitable for exterior use (I chose craft paint, but used a clear exterior sealer on top)
- A brick-pattern stencil
- Sponges/ sponge brushes of your choosing
- Paint tray
- Painter’s tape
- Clear exterior sealer
- Level
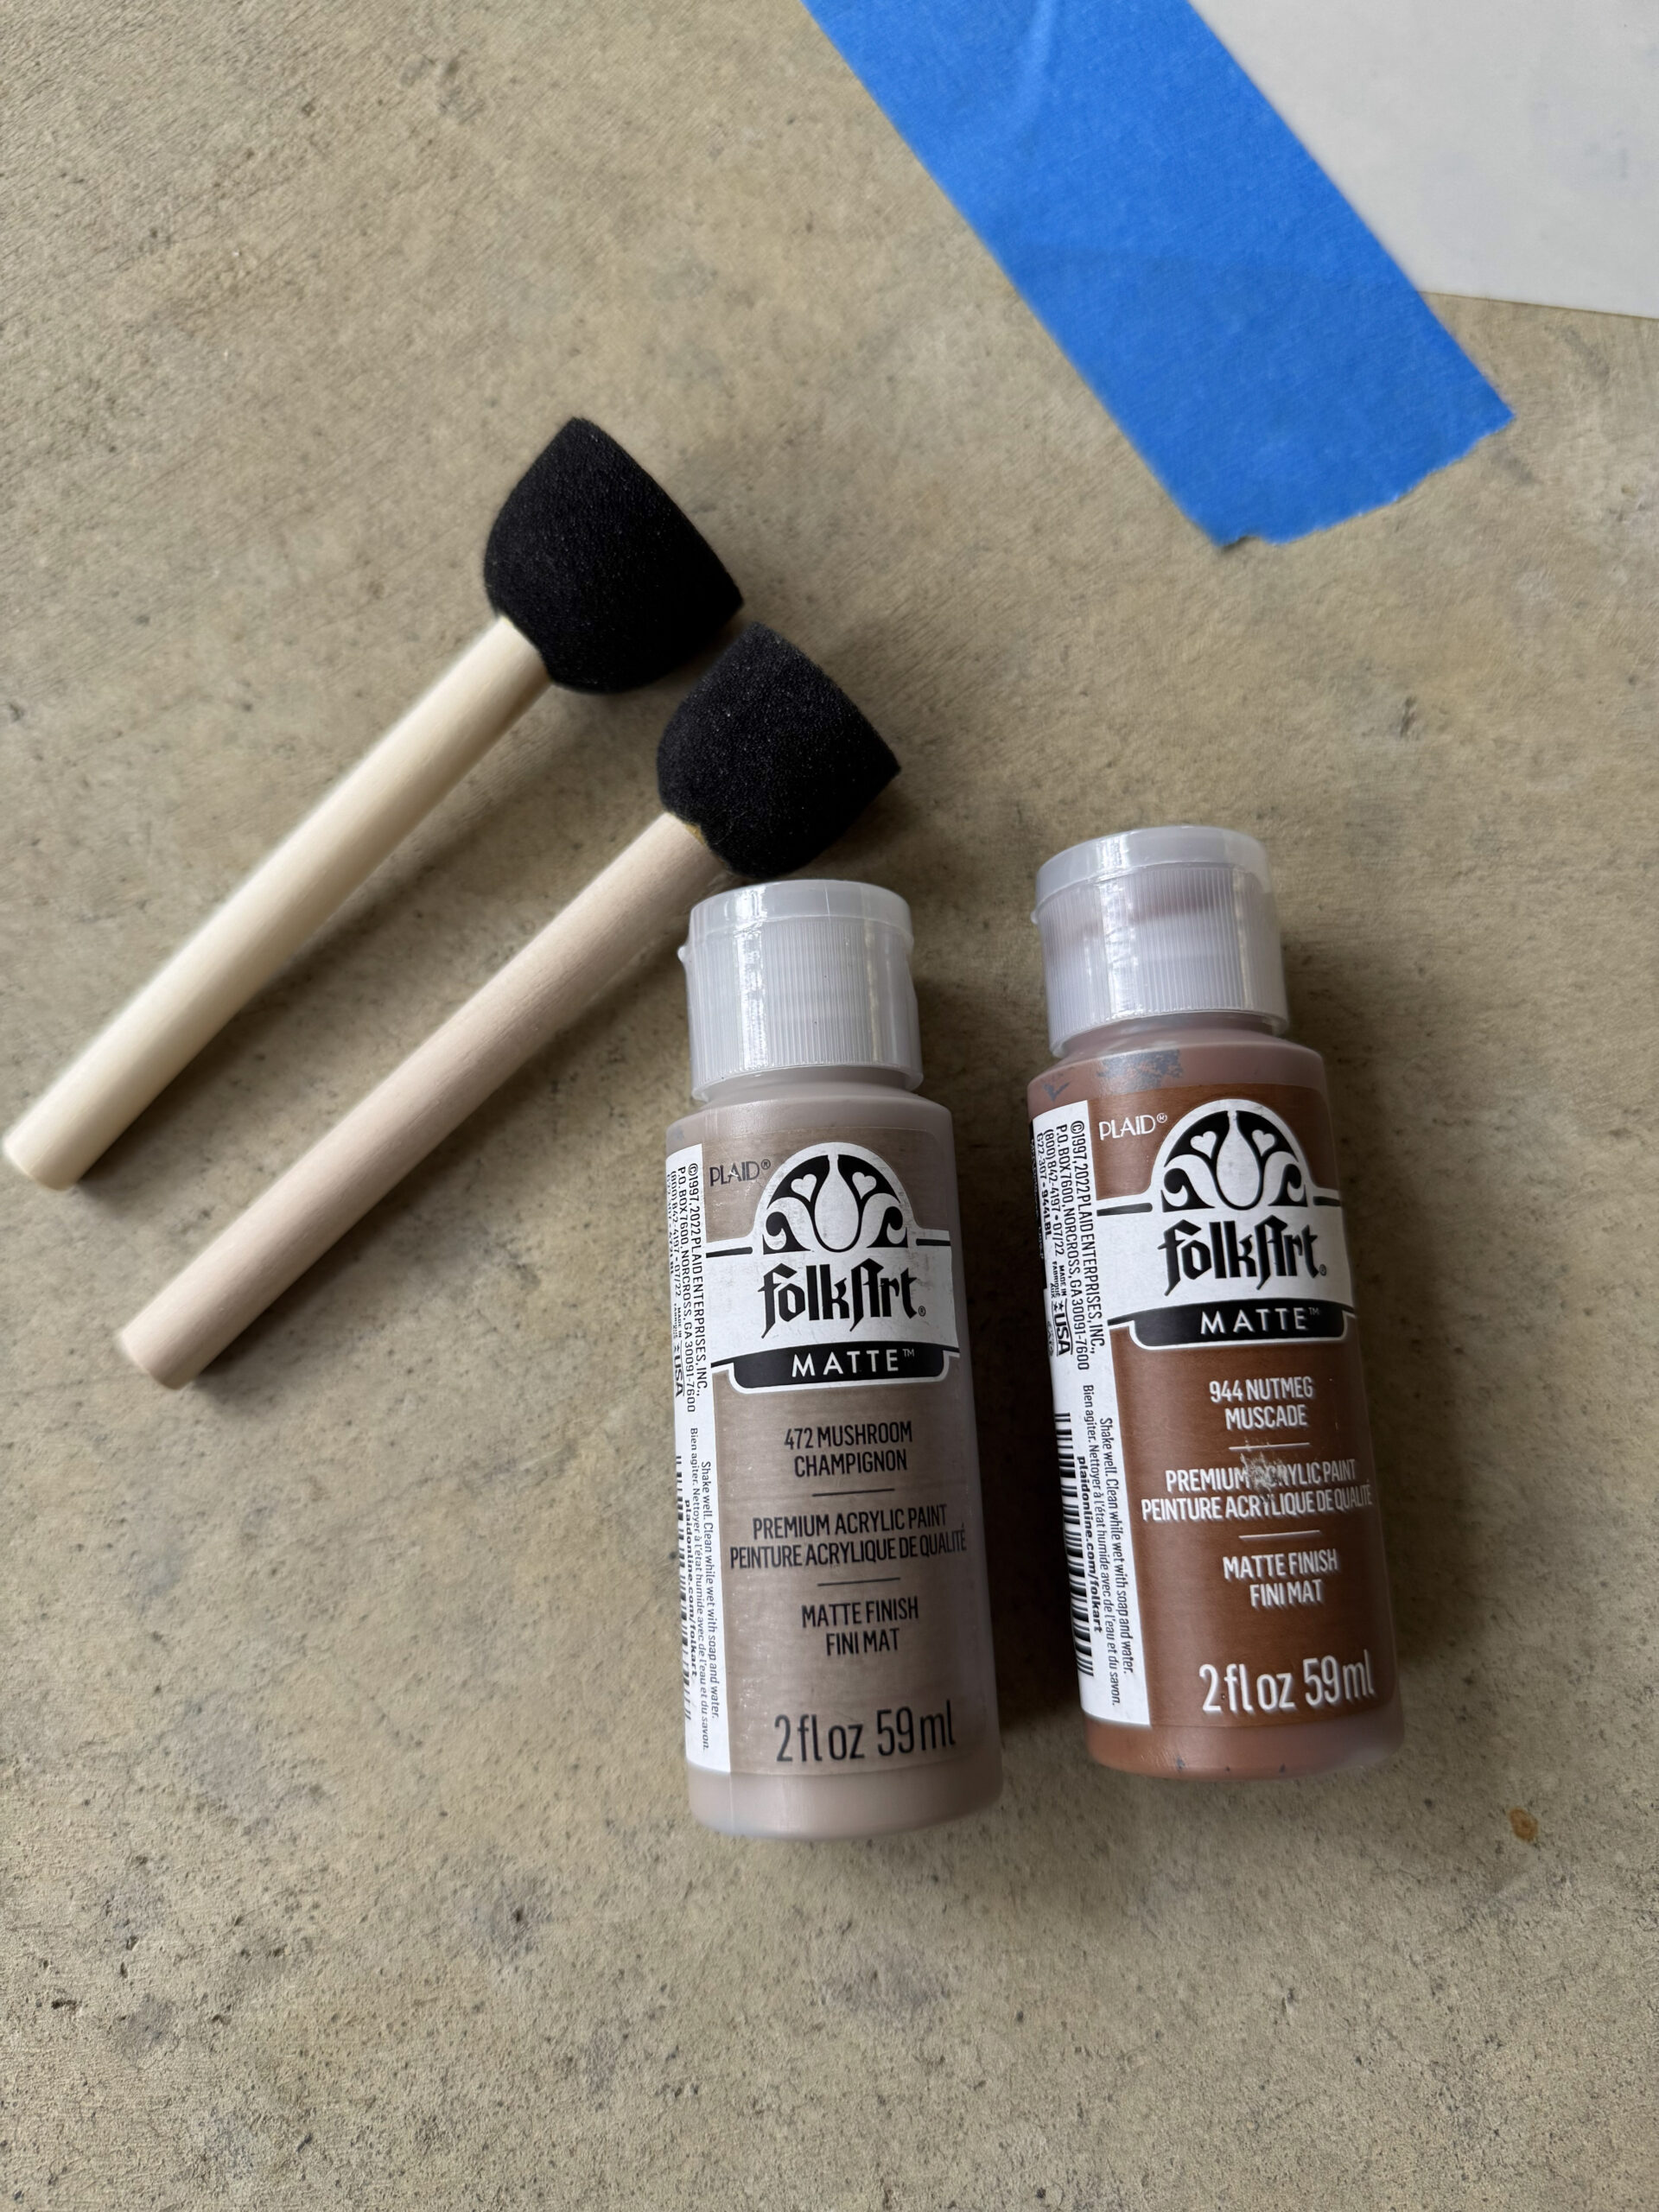
The most important thing is to choose products that are specifically appropriate for exterior concrete and foot traffic, or apply an appropriate sealant to protect the paint. Paint products and application methods can vary, so always follow the manufacturer’s directions.
Step 1: Clean the Concrete
Before I did anything else, I gave the porch a really good cleaning.
This step isn’t glamorous, but it is probably one of the most important parts of the entire project.
Paint needs a clean surface to adhere properly, so remove dirt, dust, pollen, grease, and anything else that has accumulated on the concrete.
Allow the porch to dry completely before painting.
Step 2: Position the Stencil
Now came the fun part!
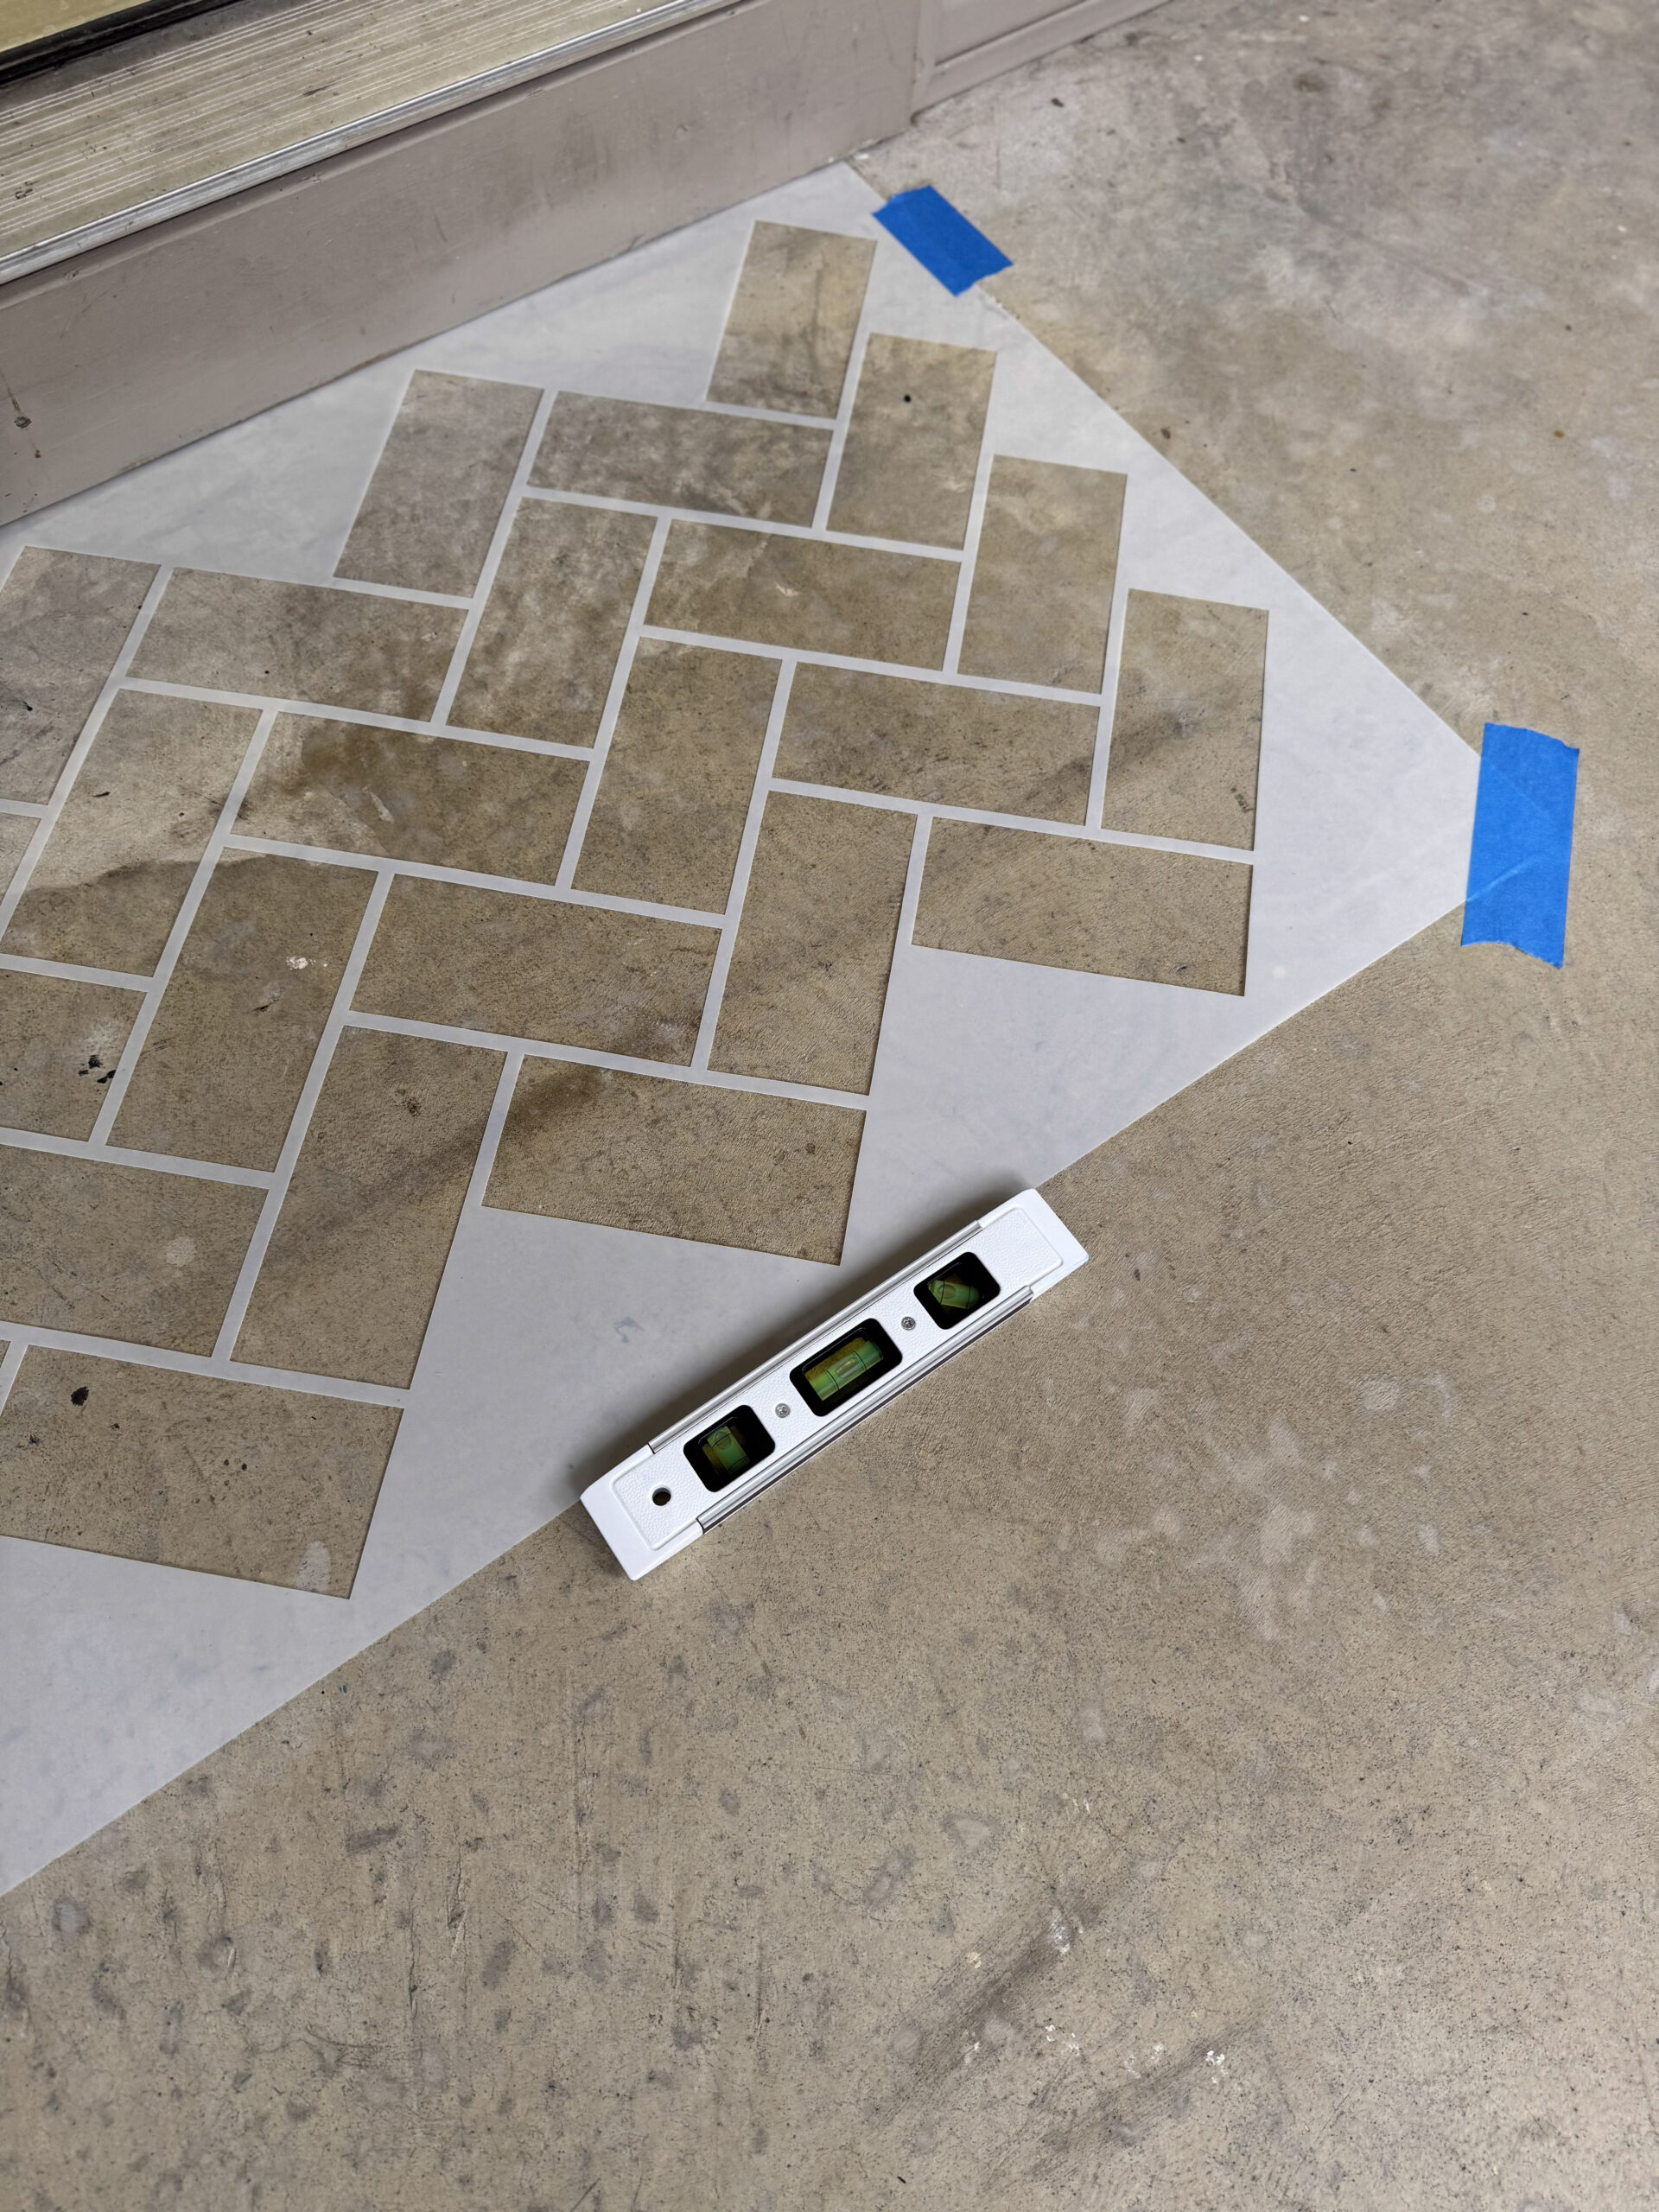
I chose a brick stencil that gave me the look of individual bricks without actually having to lay a single one.
Before jumping in with paint, I took some time to figure out how I wanted the pattern positioned.
This is one of those projects where a little planning will save you a lot of frustration later.
I used painter’s tape to hold the stencil in place and started in an area where I could establish my pattern.
Depending on the size and shape of your porch, you may need to measure and plan where your pattern will begin and end.
Step 3: Paint the Faux Brick
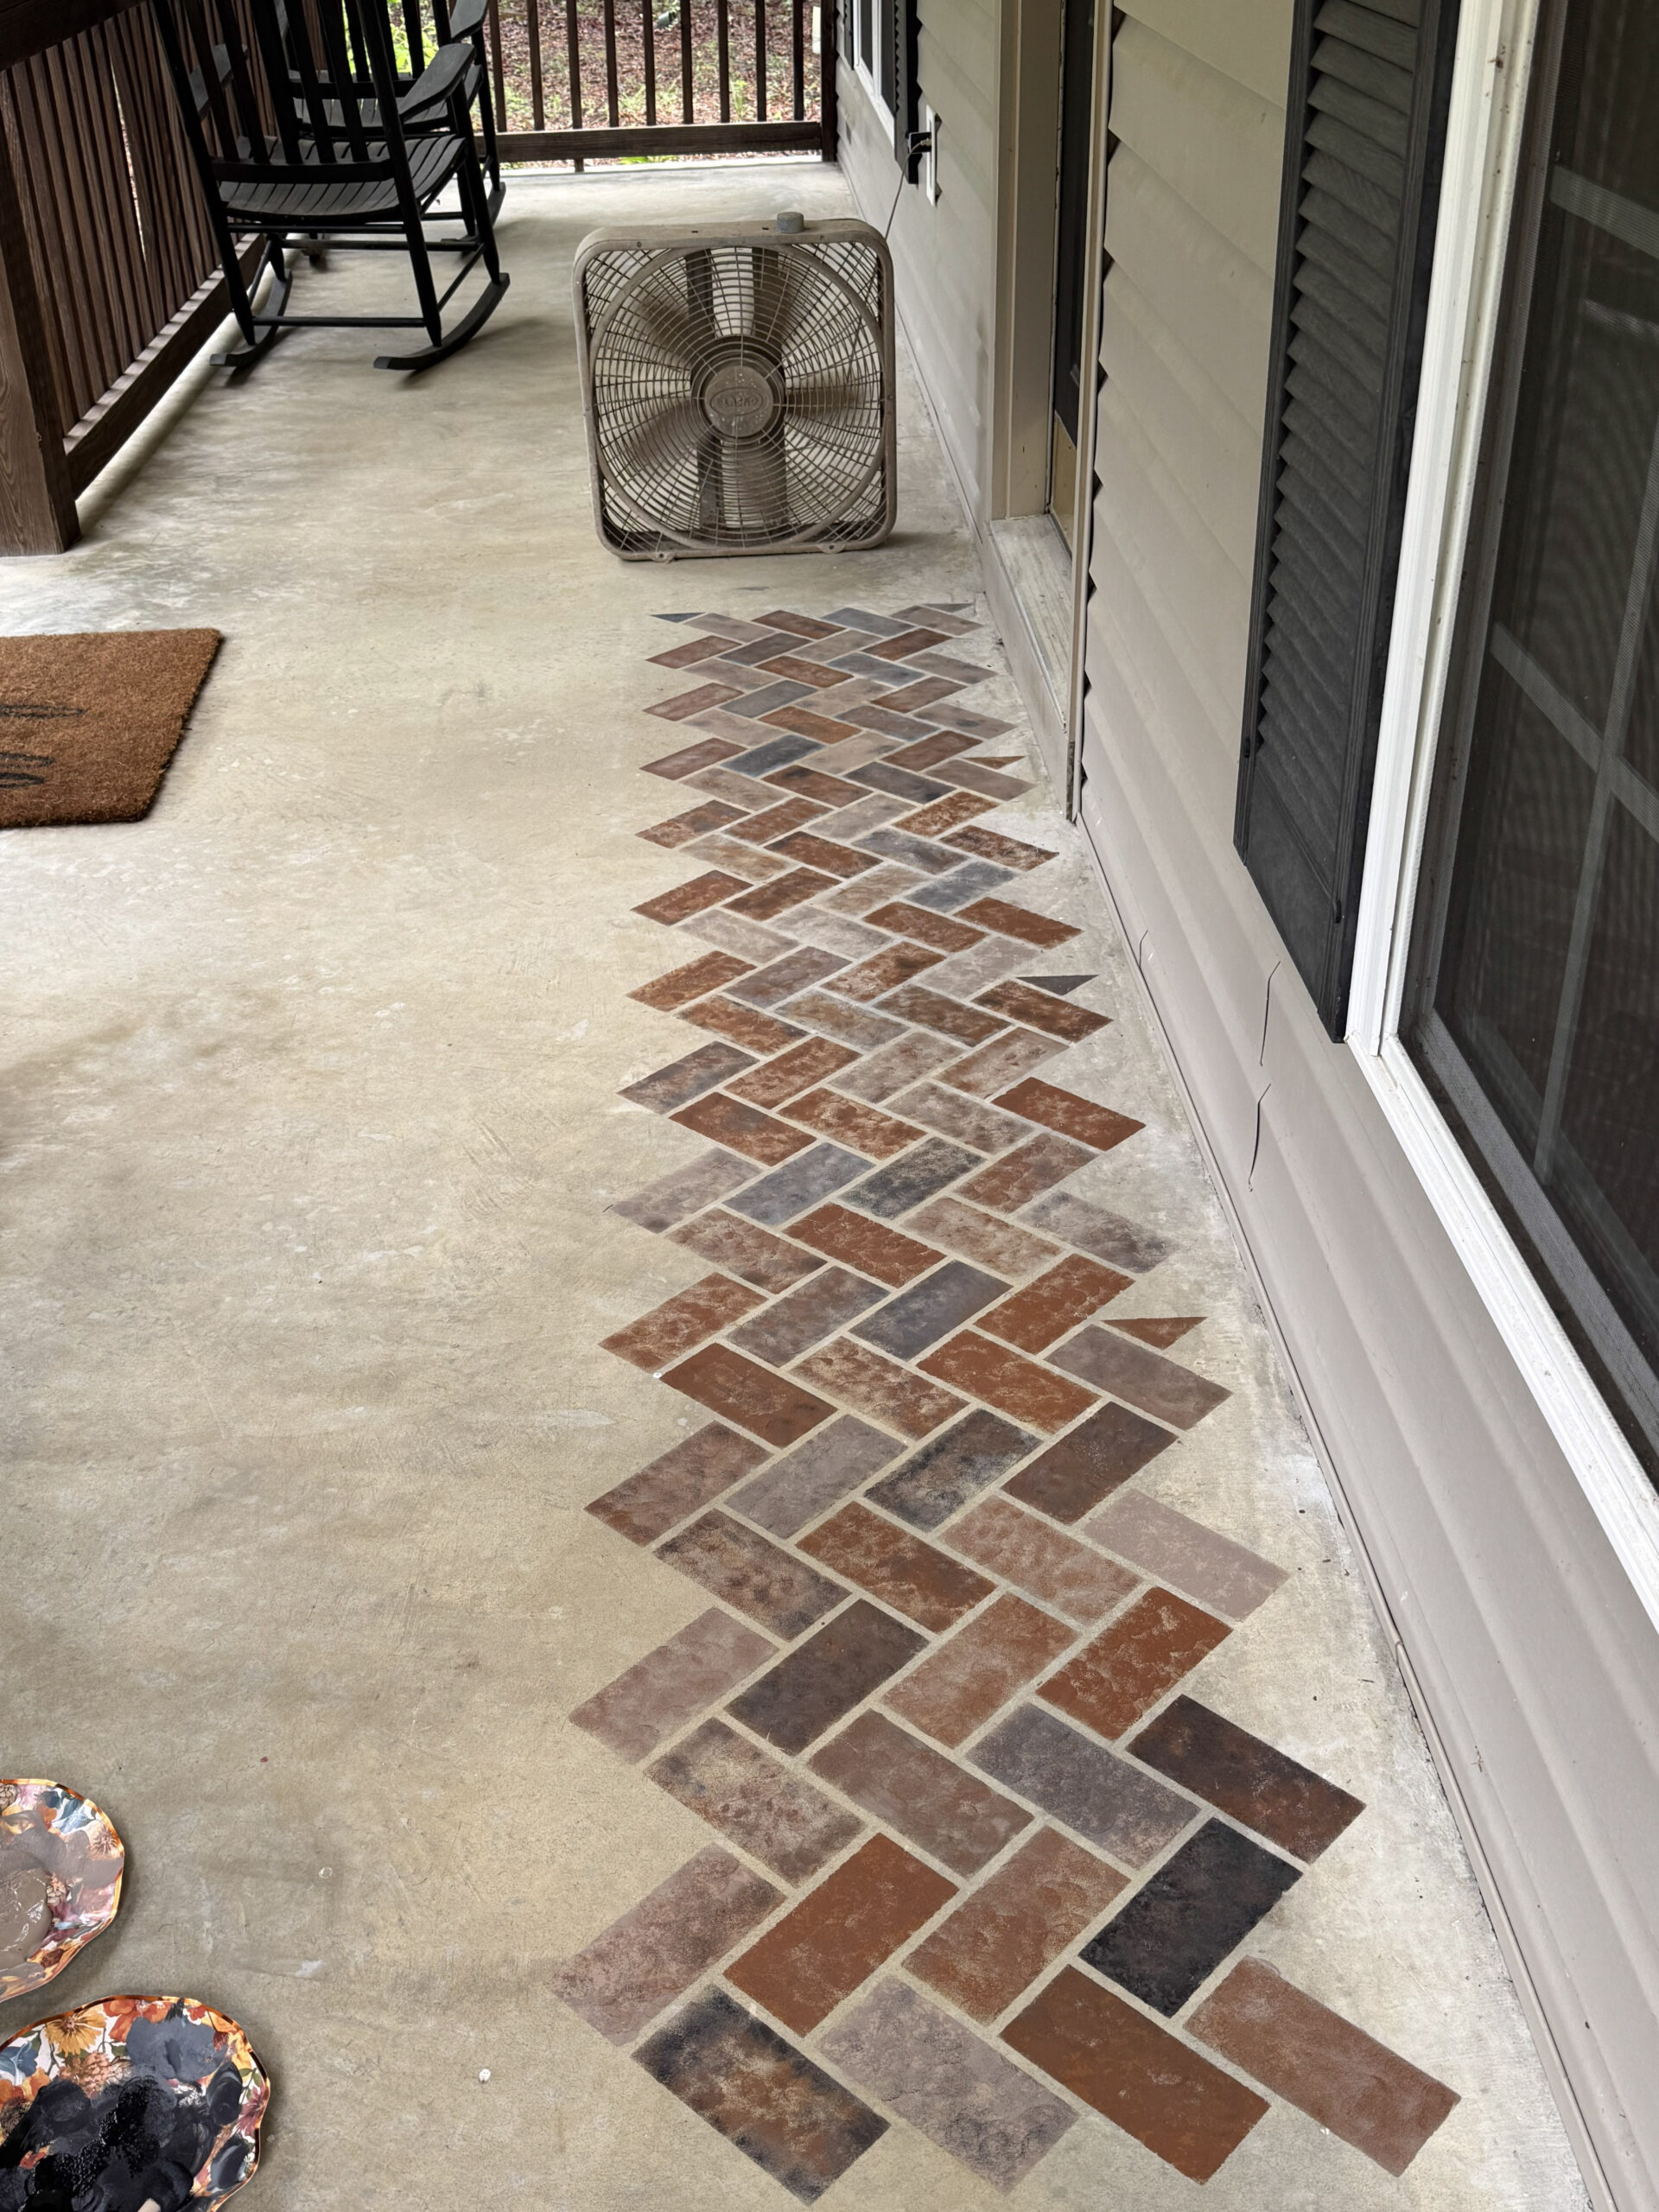
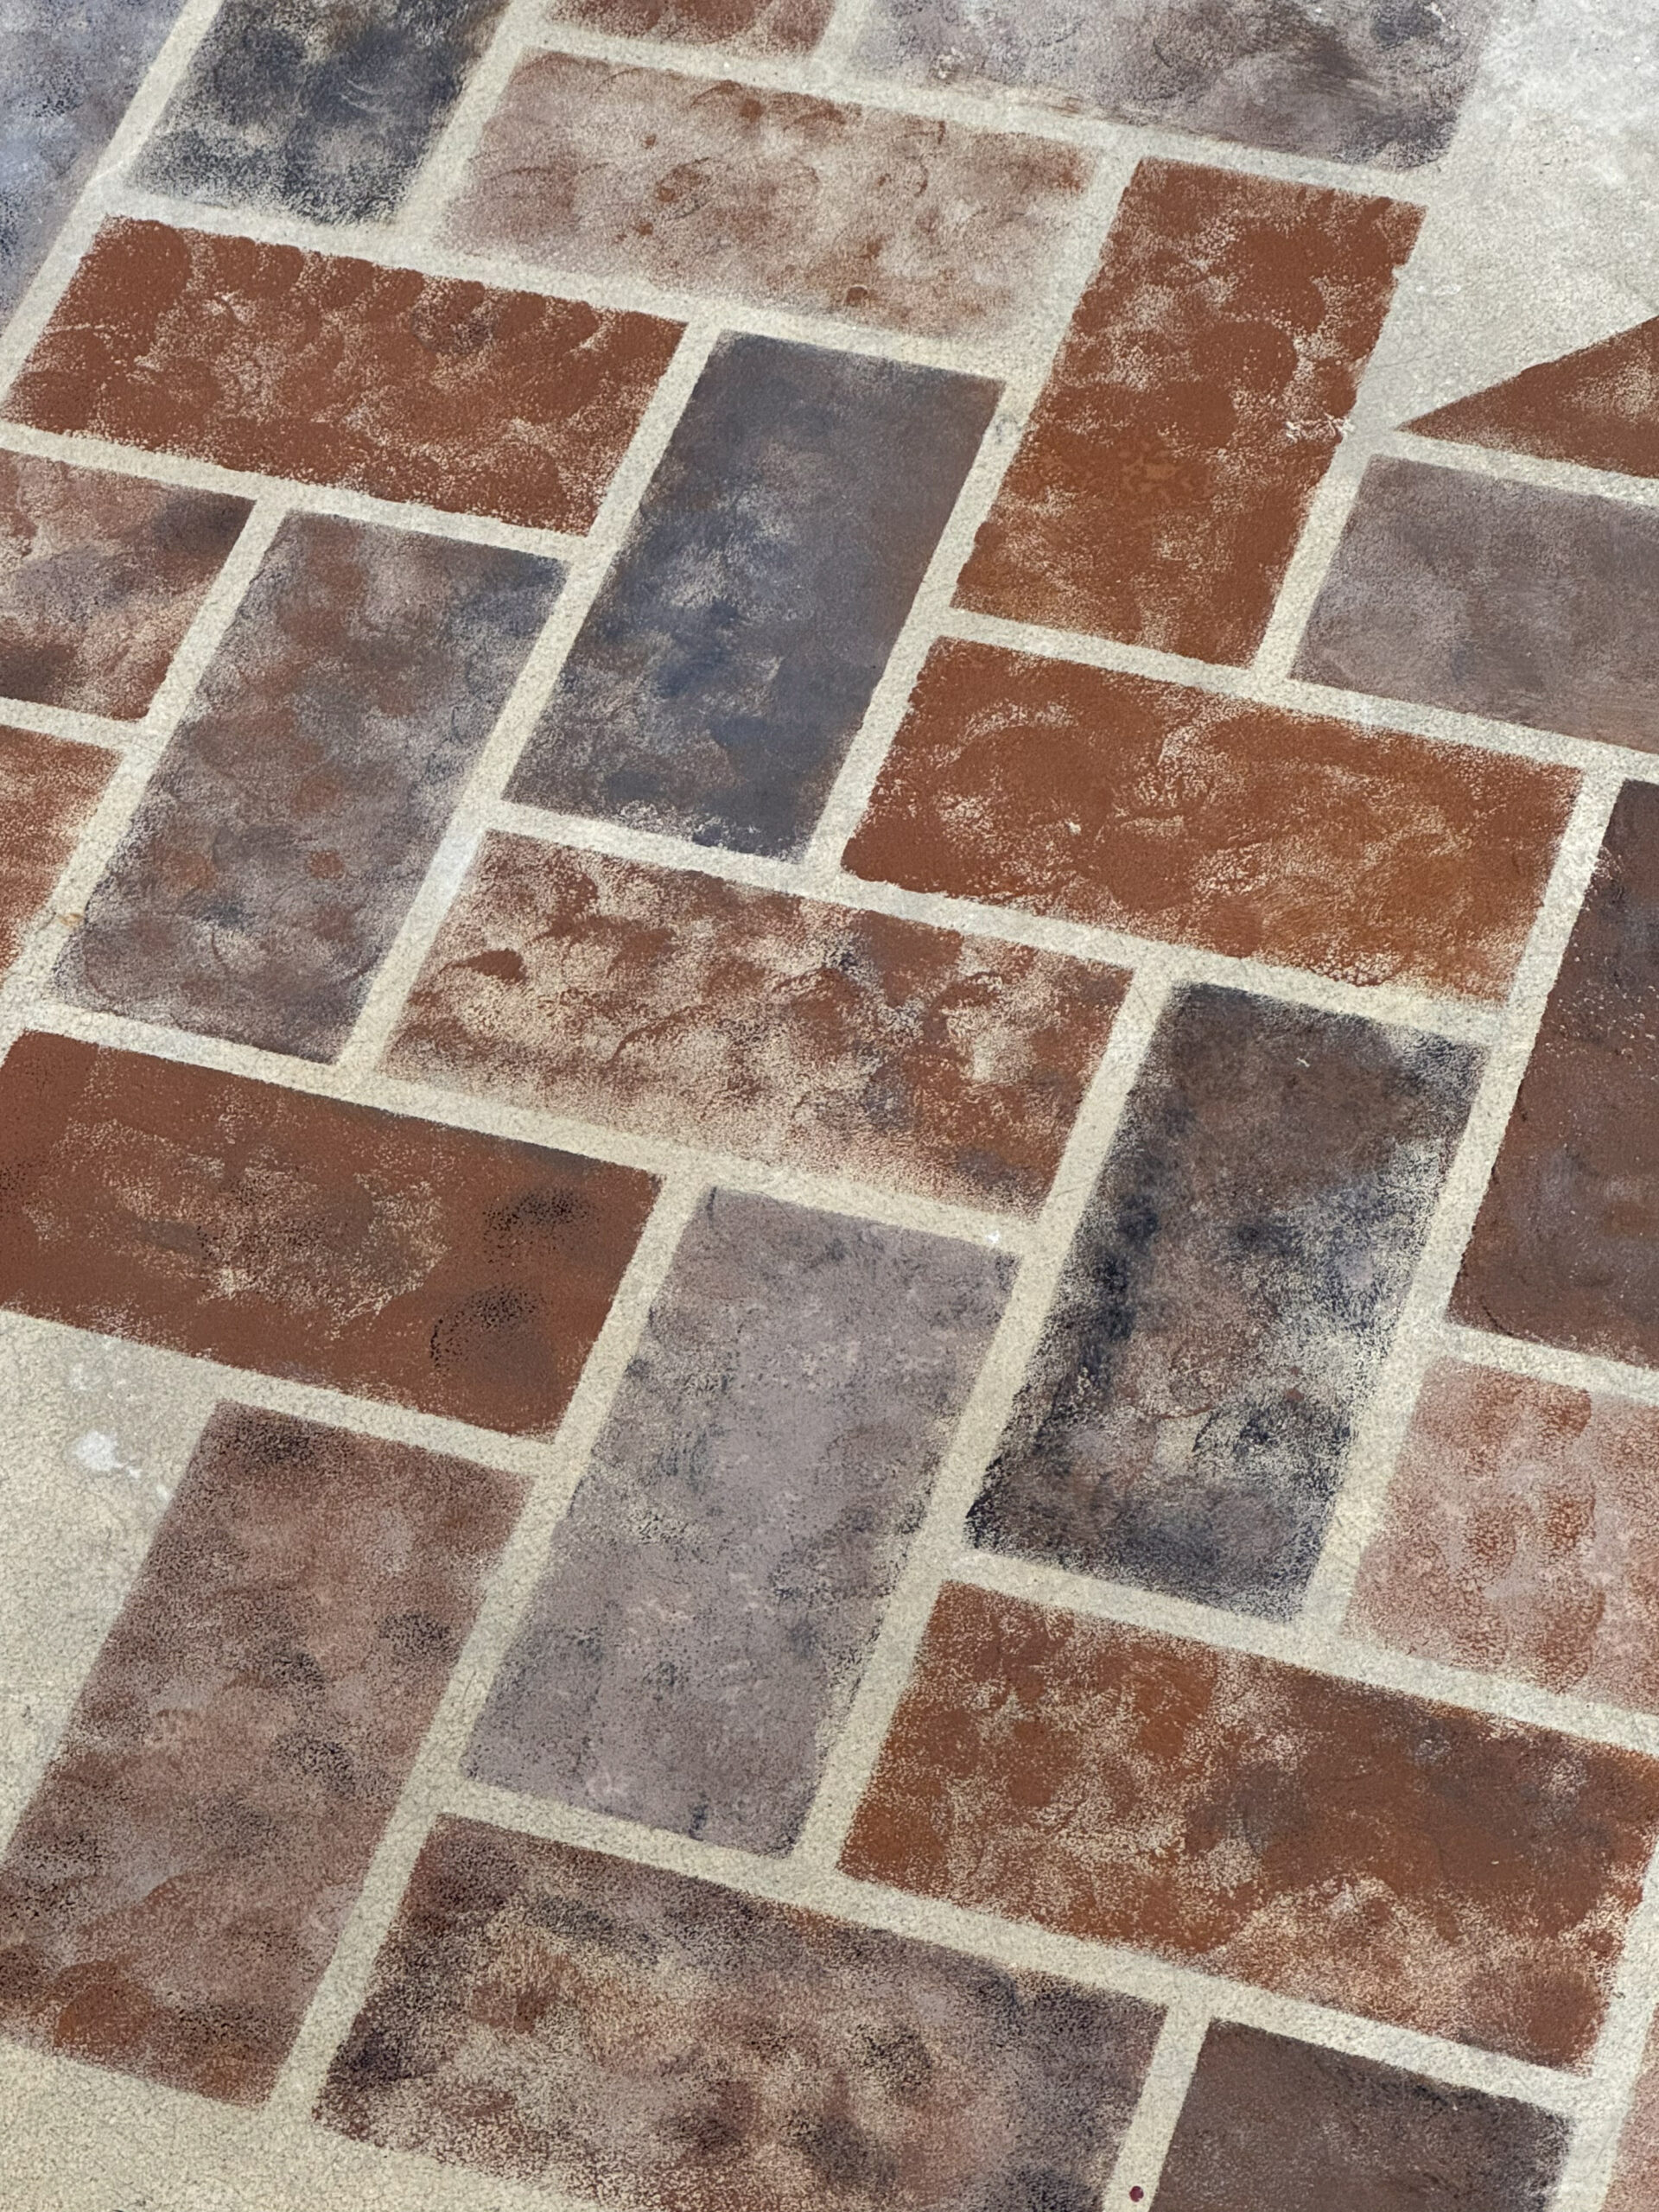
With the stencil securely in place, I applied my paint. Because I was going for an aged brick look, no two bricks are exactly the same. I used the sponges/brushes to play with the colors until I liked the way they looked. I used two basic colors (Mushroom and Nutmeg in matte finish) and then added in a little white or black to add a textured look to the mixture.
The trick with stenciling is to use less paint than you think you need.
Too much paint can seep underneath the stencil and blur the edges of your pattern.
I applied the paint with a light tapping motion rather than brushing it back and forth.
Once I finished one section, I carefully lifted the stencil and repositioned it for the next section.
Then I repeated the process…
…and repeated it…
…and repeated it.
Let’s just say there was a LOT of stenciling involved!
But watching that brick pattern appear across the porch made it completely worth it.
Step 4: Work Your Way Across the Porch
I continued moving the stencil across the porch, making sure to line up the pattern as I went.
This is where patience becomes your best friend. I also want to mention that the stencil I chose did not have wide dividing lines in between the bricks. My idea was to use the existing concrete as the “mortar” and having smaller lines in the stencil really helped to create the illusion of real bricks.
Concrete porches aren’t always perfectly square, so there may be areas around the edges, corners, or posts where the stencil doesn’t fit exactly.
Don’t worry about making every single brick perfect.
In fact, I think some of the imperfections are what make a faux finish look more believable.
Real brick isn’t perfectly uniform either!
For the edges and awkward areas, I used a small brush and filled in what I needed to complete the pattern.
Step 5: Let It Dry and Add Protection
Once I finished stenciling, I allowed the paint to dry completely according to the manufacturer’s instructions.
Depending on the products you use, you may also want to apply an appropriate exterior sealer for additional protection. Because I chose not to use actual exterior porch paint, I definitely needed to add protection.
My front porch does not get much foot traffic at all, but because this is an outdoor surface that is exposed to weather, I choose a sealer that is compatible with my paint and concrete surface.
And then came the hardest part…
Waiting for it to be completely finished so I could admire it!
The Finished Porch
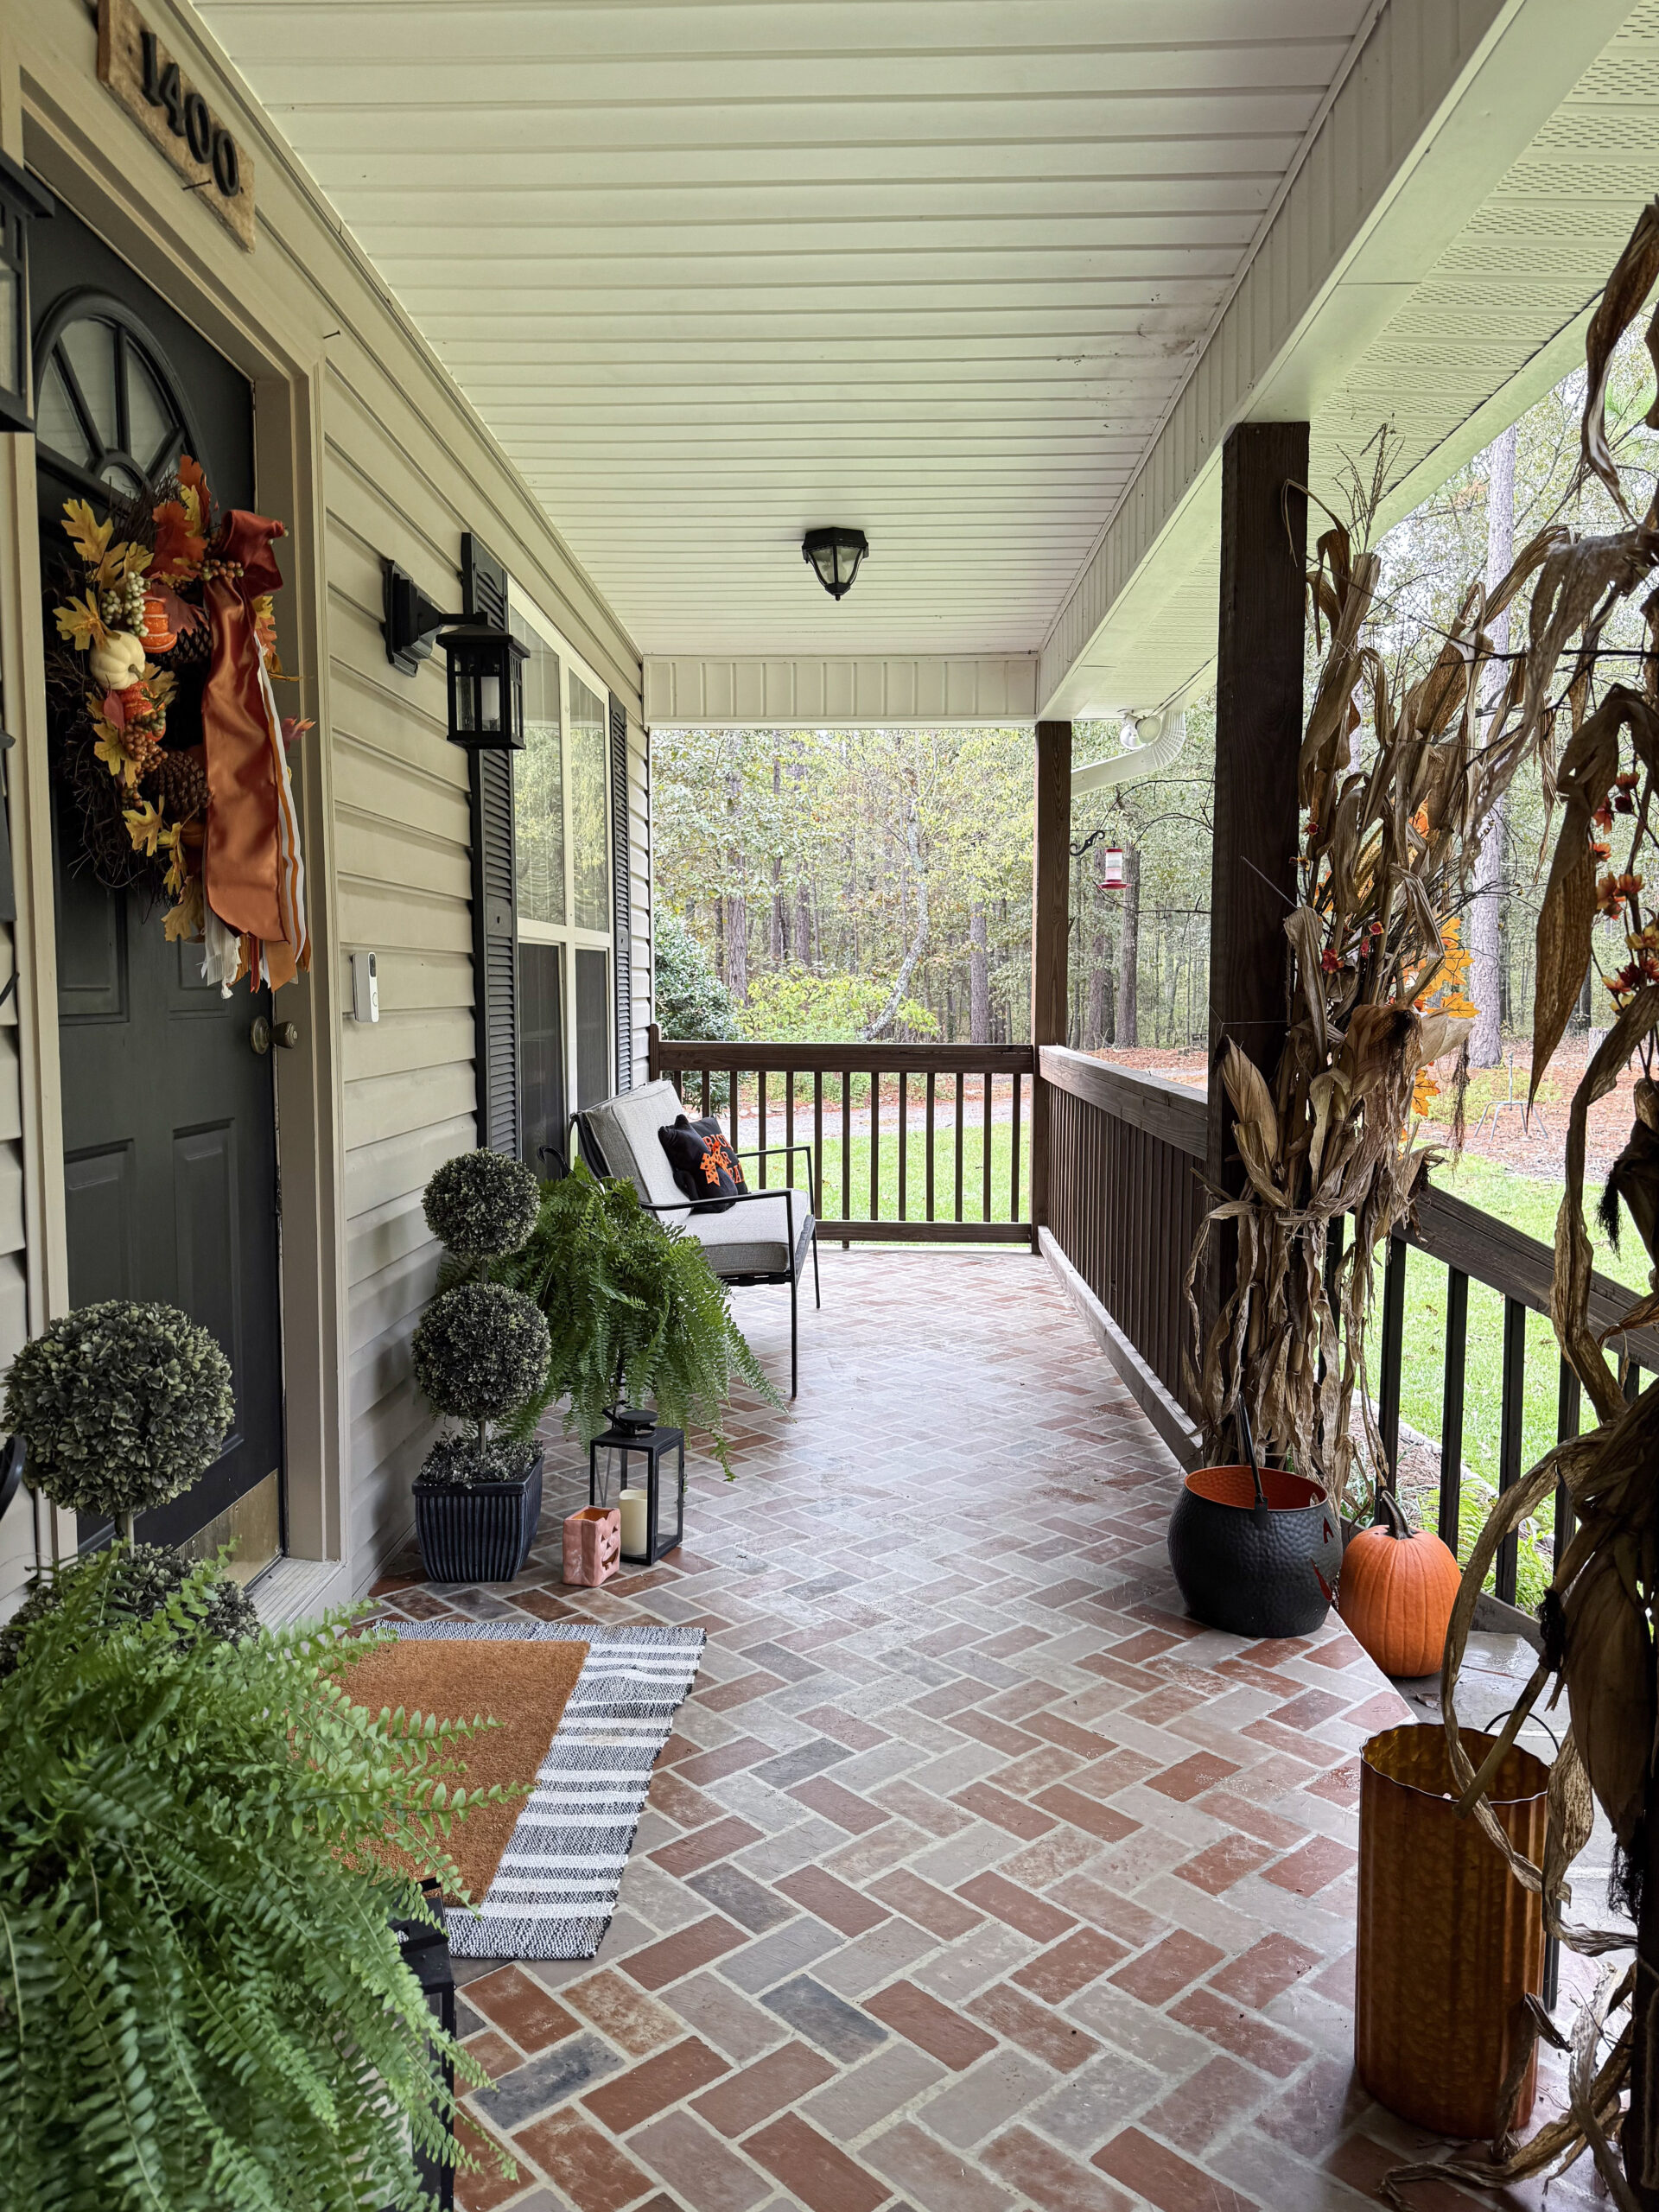
I honestly can’t believe what a difference paint made.
What started as a plain concrete porch now looks like a charming brick surface with so much more character.
And I love that I was able to create the look without replacing the concrete.
Was It Worth It?
Absolutely.
This project did take some time and patience, especially because of all the stenciling, but the transformation was much bigger than I expected.
I love DIY projects that don’t require a huge renovation to make a noticeable difference.
Sometimes all a space needs is a little paint and a willingness to try something new.
And if you’ve been staring at a plain concrete porch wondering what you can do with it, I hope this gives you a little inspiration.
You don’t always have to replace something to make it beautiful. Sometimes you just need to look at it differently.
And apparently, in my case, you need paint and a brick stencil!
Pin this project for later and save it for the next time you’re ready to give your porch a little makeover!