
Our Vintage Camper Restoration
One of my favorite diy projects to date was this vintage Scotty Gaucho camper that Mister and I restored. We love the outdoors and decided a small camper for some of our outdoor adventures was just what we needed.
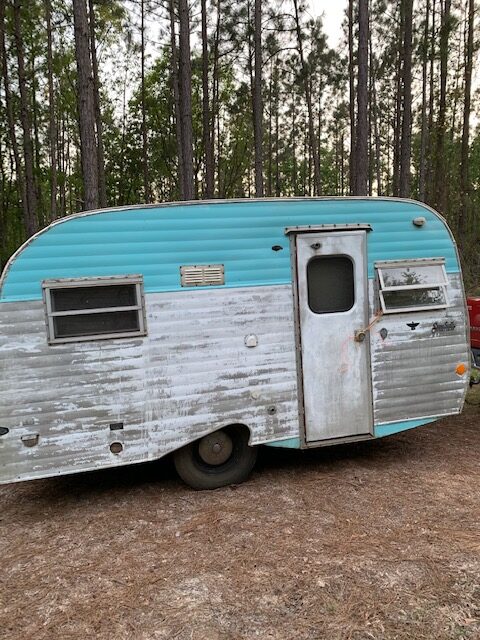
We found the camper for sale on line through a friend and quickly bought it before someone else realized what a great flip project it would be.
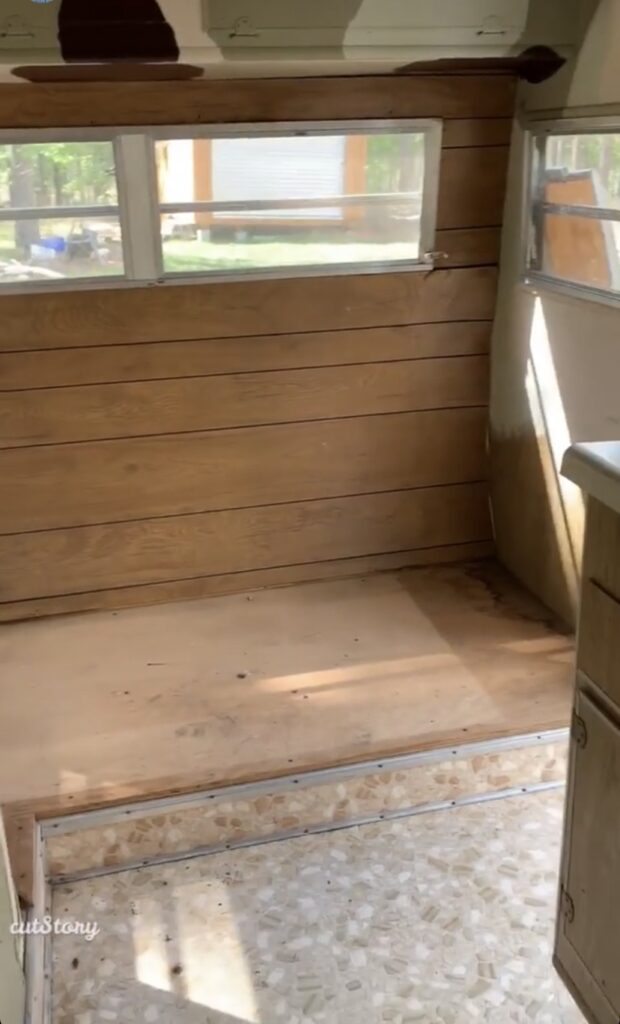
You can probably tell from the pictures that it no longer had all the original interior. It was most recently used as a hunting camper.
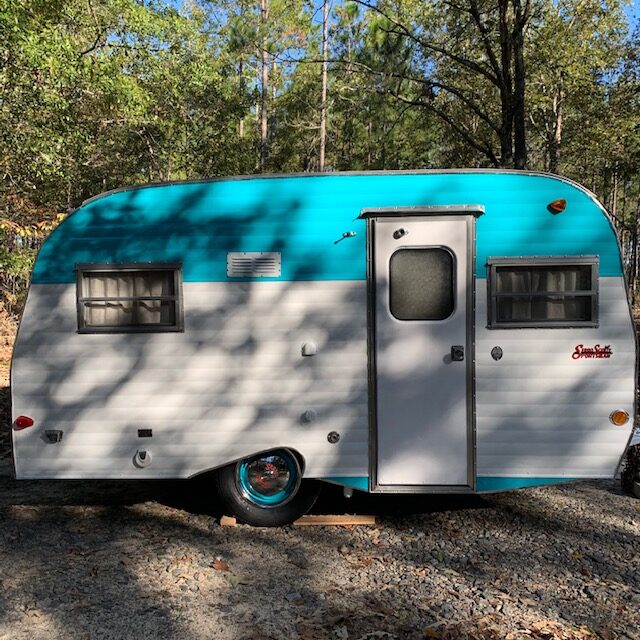
We made the decision up front to keep the outside as close to original as possible, but I wanted a more neutral interior, combining my favorite styles of cottage and boho.
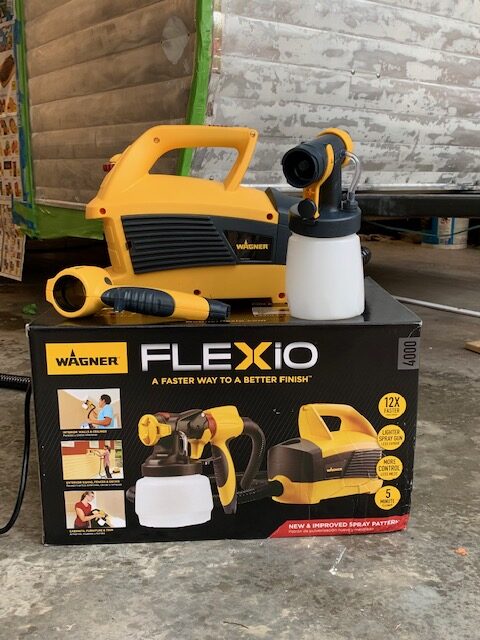
We were fortunate to be able to work with Wagner and have a paint sprayer to paint the outside. It made the process much quicker and easier than it would have been otherwise and the paint went on so smoothly.
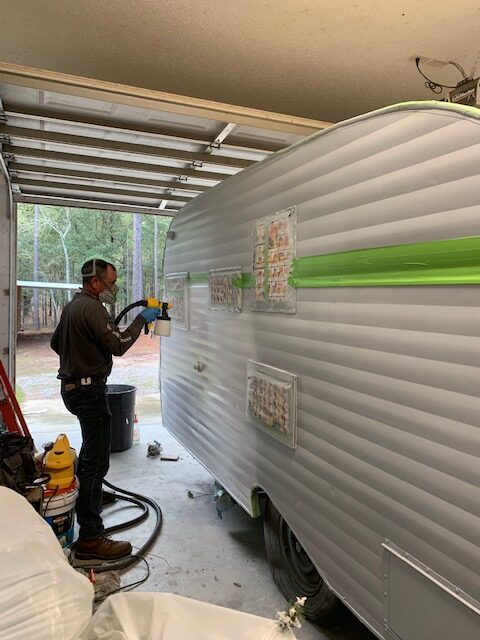
We primed the outside with gray primer from Rust-Oleum. Then we painted the main body of the camper with Rust-Oleum’s Gloss White Protective Enamel Oil-Based paint. The blue part is called Oasis Blue from Rust-Oleum, the Painter’s Touch Ultra Cover Paint + Primer spray.
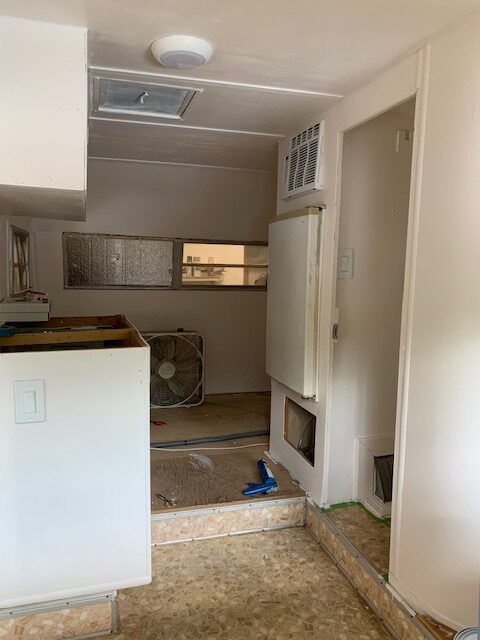
We ripped out most of the ceiling and walls in the camper and redid them. The original flooring was still in pretty good shape, so we kept it. We found a similar pattern at Lowe’s for the two raised areas on each end of the camper where the sub-floor had been redone.
We only had to replace one window in the camper and we were lucky enough to find one that would have been original to this camper.
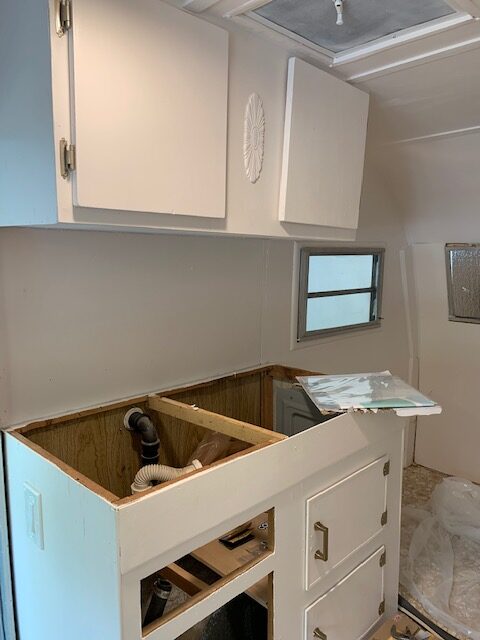
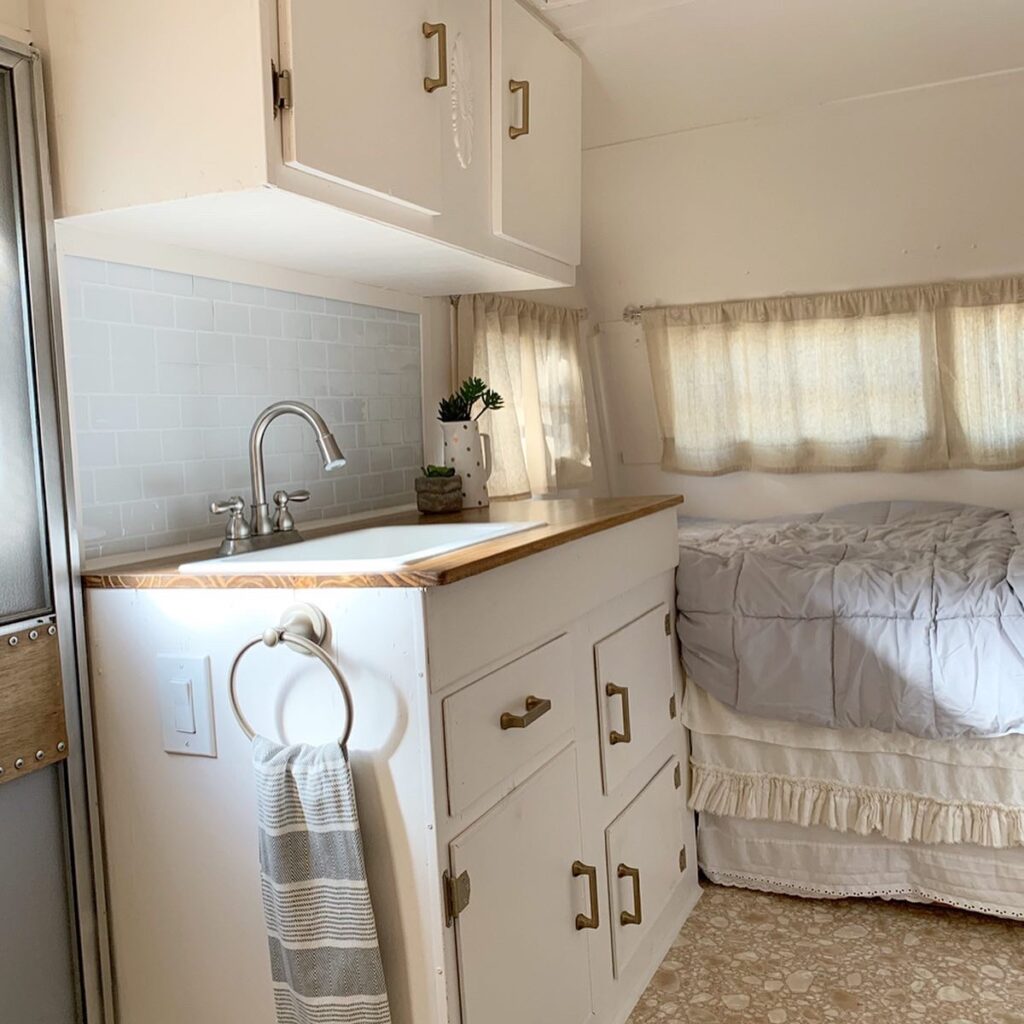
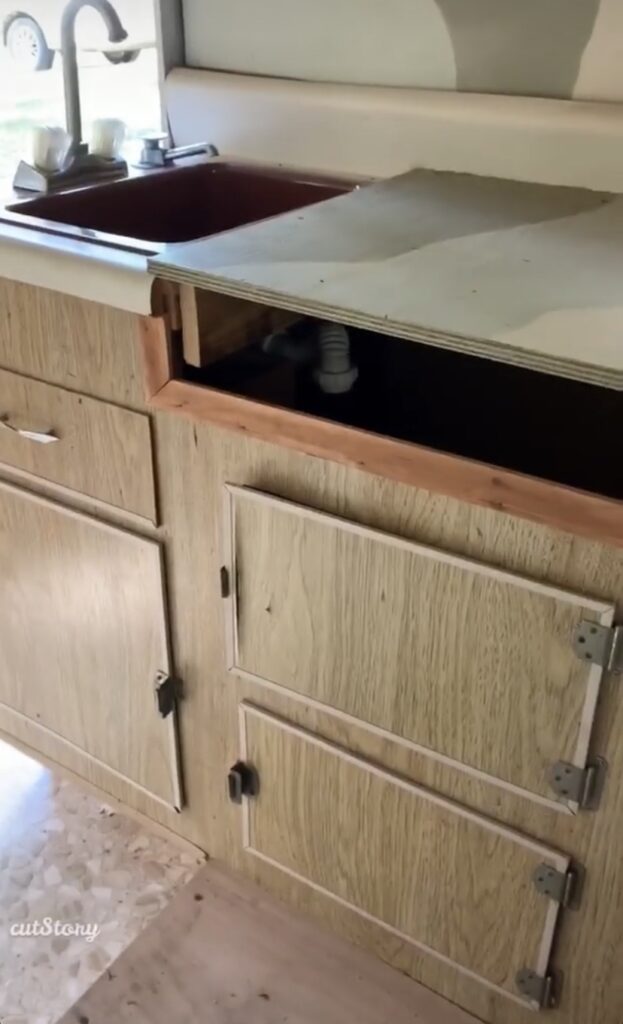
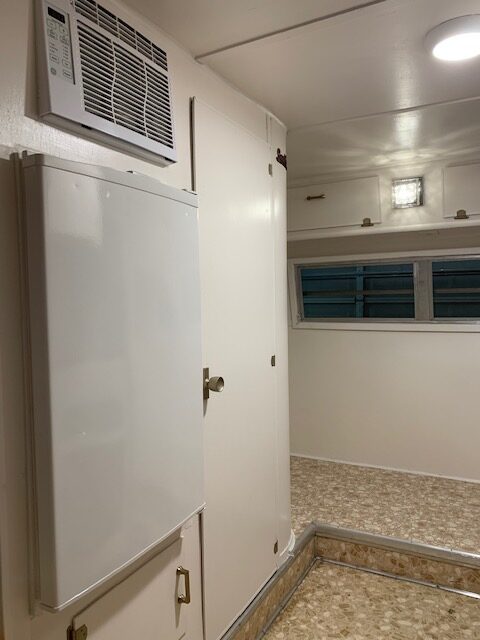
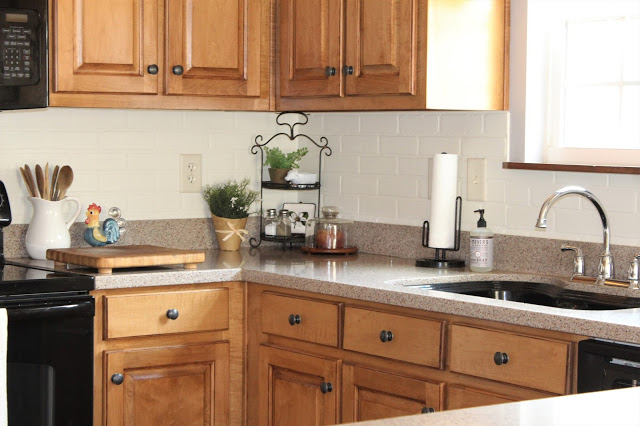
We kept the existing cabinet in the kitchenette and Mister built the upper cabinet for extra storage. The original hardware was damaged (plus I didn’t like it), so I chose champagne bronze hardware from Home Depot to add a little modern vibe.
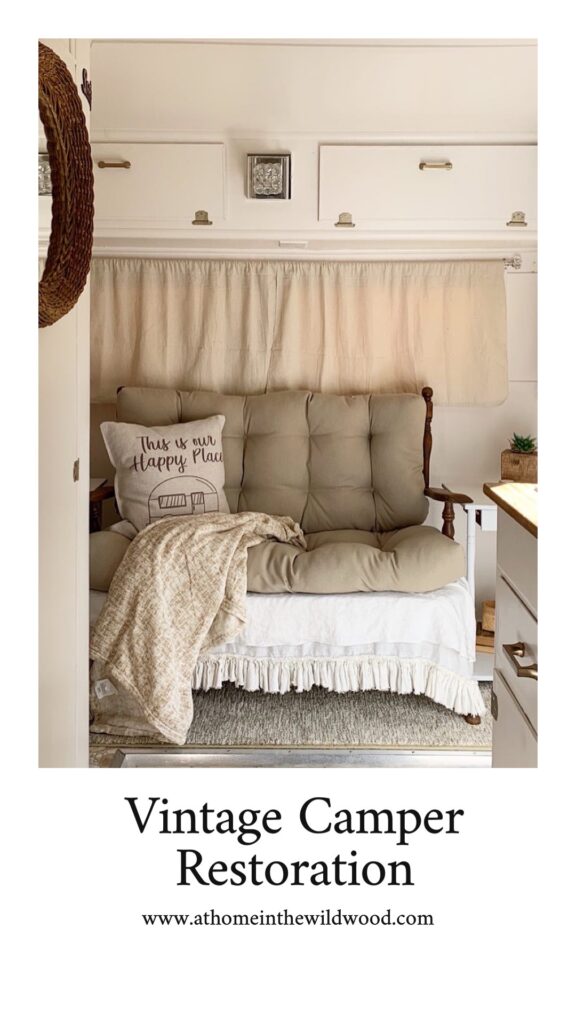
I chose to do an all white interior to make the small space appear bigger. One of my favorite colors is called Heirloom White by Rust-Oleum. It has a satin sheen so it’s easy to wipe clean if needed.
The refrigerator received a fresh coat of paint as well. We used a white appliance epoxy by Rust-Oleum and it looks brand new. We also purchased a new air conditioner to keep us cool on those hot summer trips.
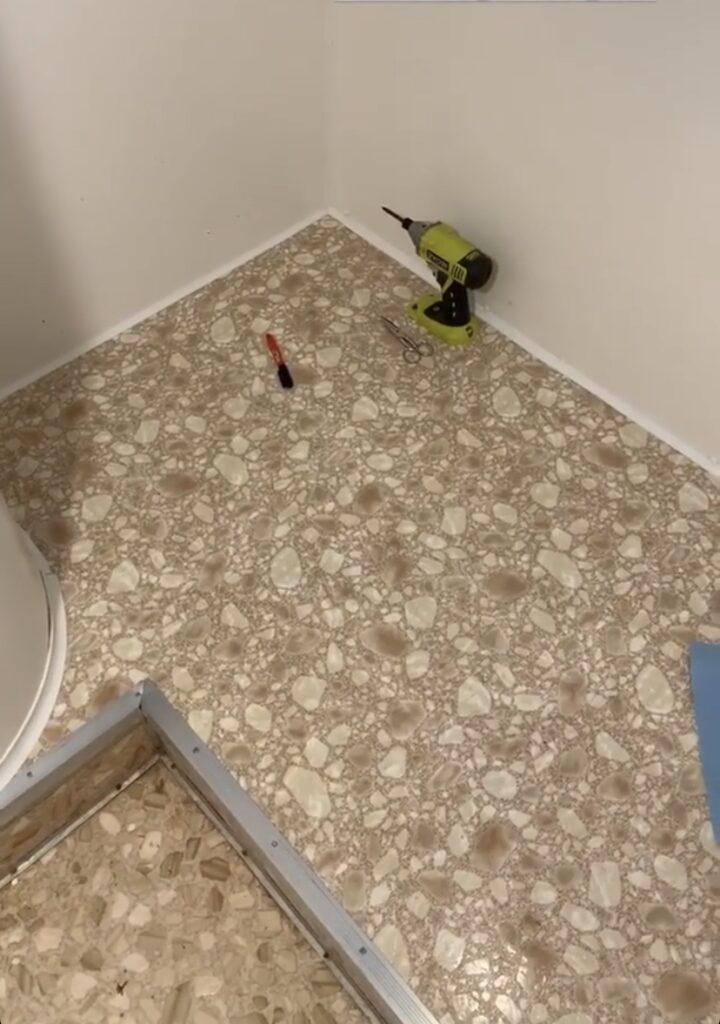
We glued down new linoleum on the two raised ends of the camper. You can see from this photo above how similar they are. They did’t need to be exact since most of the floor is either covered with furniture or area rugs.
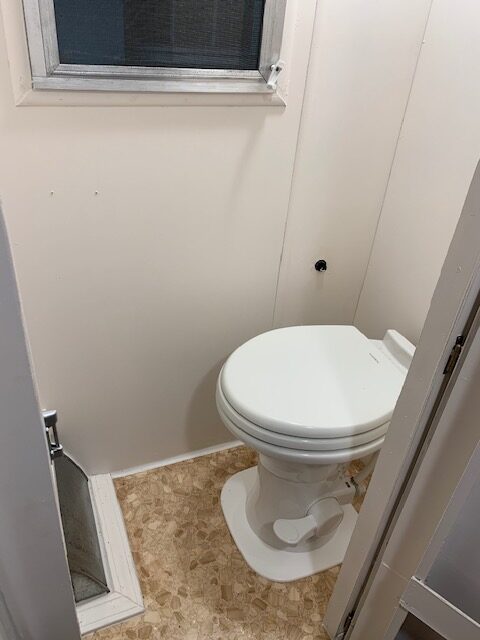
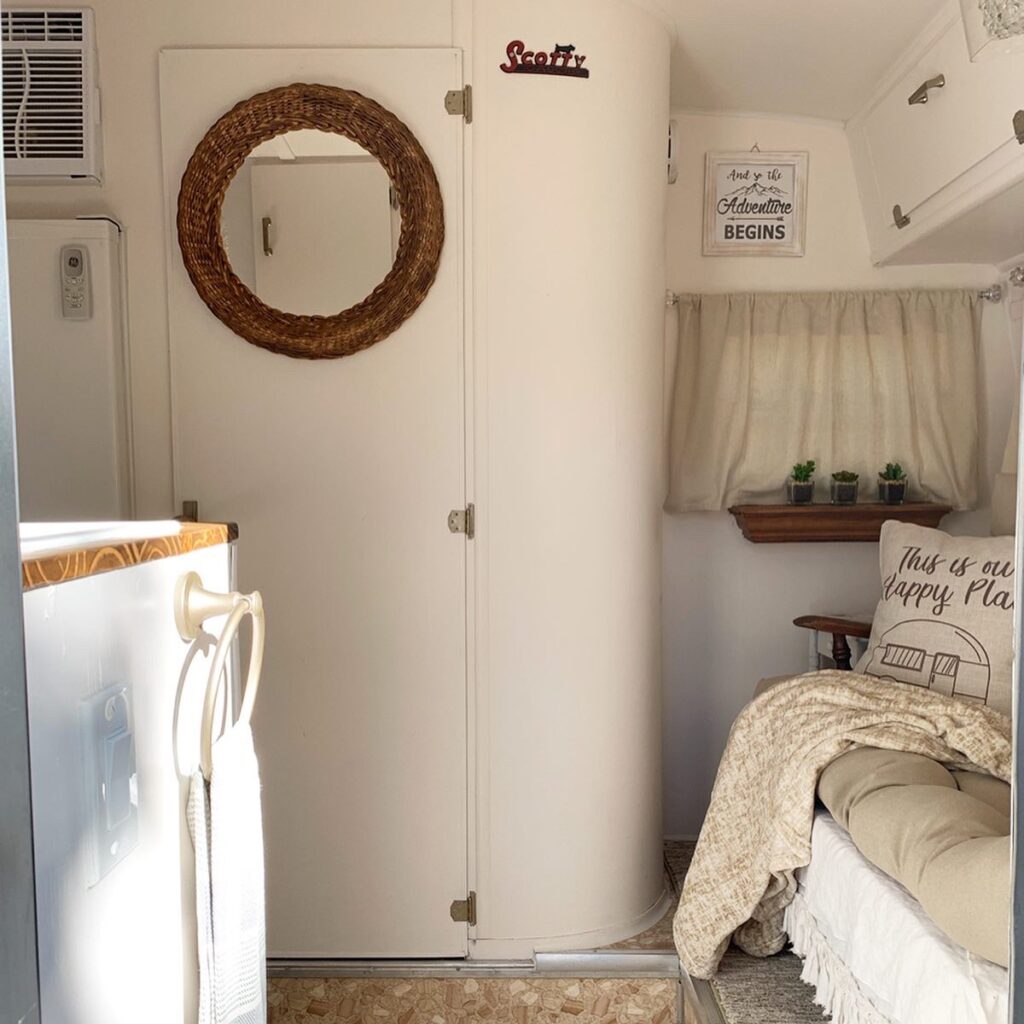
The little toilet closet got a fresh coat of paint as well. We kept the original floor but purchased a new toilet for the space. Since this photo, I’ve added a small rug and wall decor to the space.
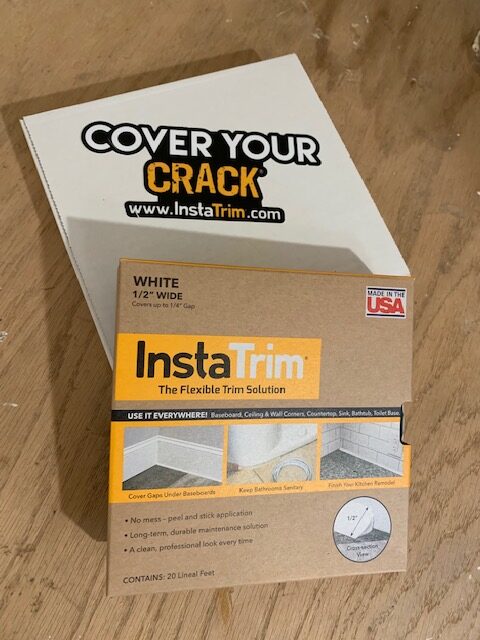
We also worked with a company called InstaTrim and used their peel and stick caulking around our baseboards and walls to neatly trim out the space for a more finished look.

The trim is really easy to use. It’s flexible and the perfect molding for filling cracks and keeping out moisture.
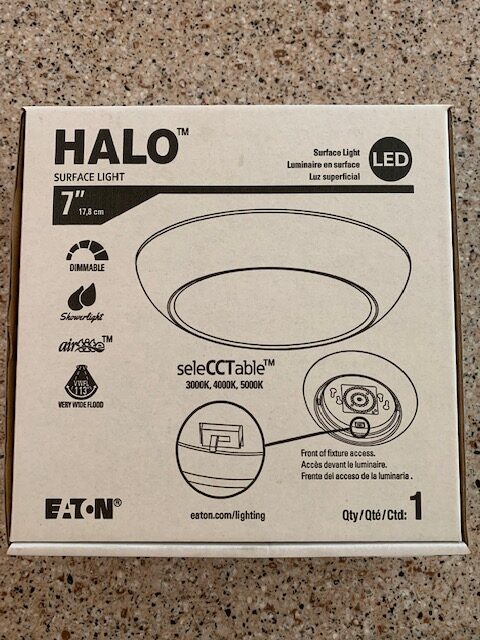
For lighting, we chose these Halo lights for the ceilings. They are low profile and perfect for campers where you don’t have alot of ceiling height.
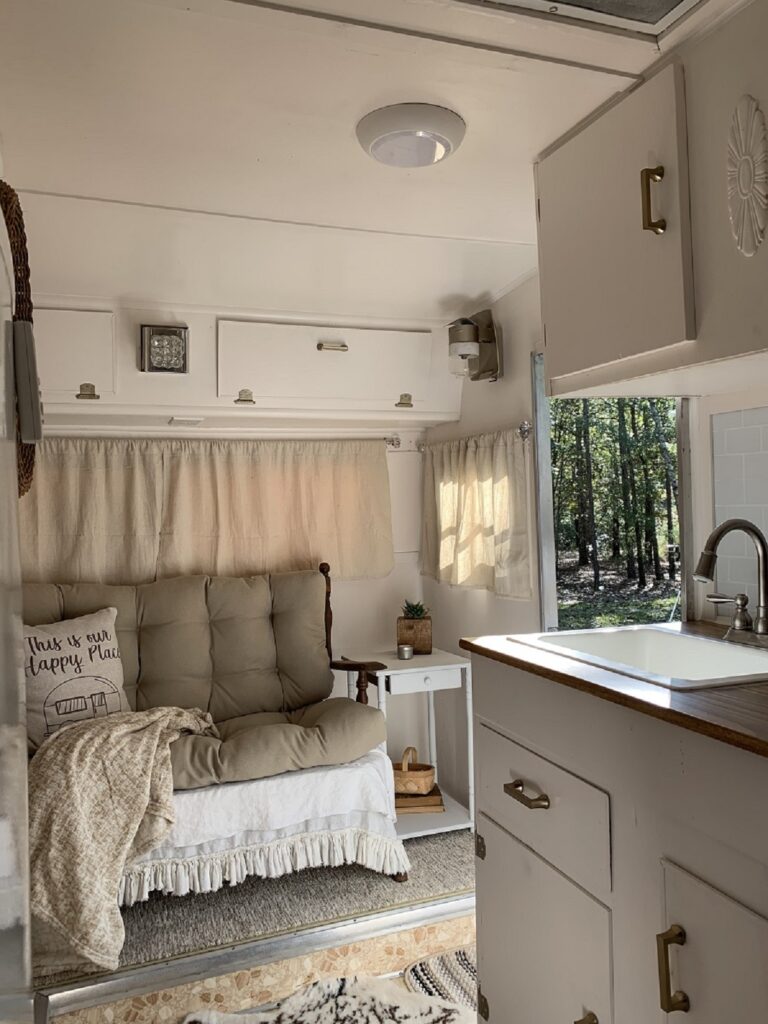
In the photo above, you can see one on the ceiling. You can also see the cute light I picked out for the seating area. Because of where it is, I had to be careful to choose something that we would not hit our heads on. But I also wanted something with a little more glam and I thought this one was adorable 🙂
It was also purchased at Home Depot. Can you tell I love Home Depot?
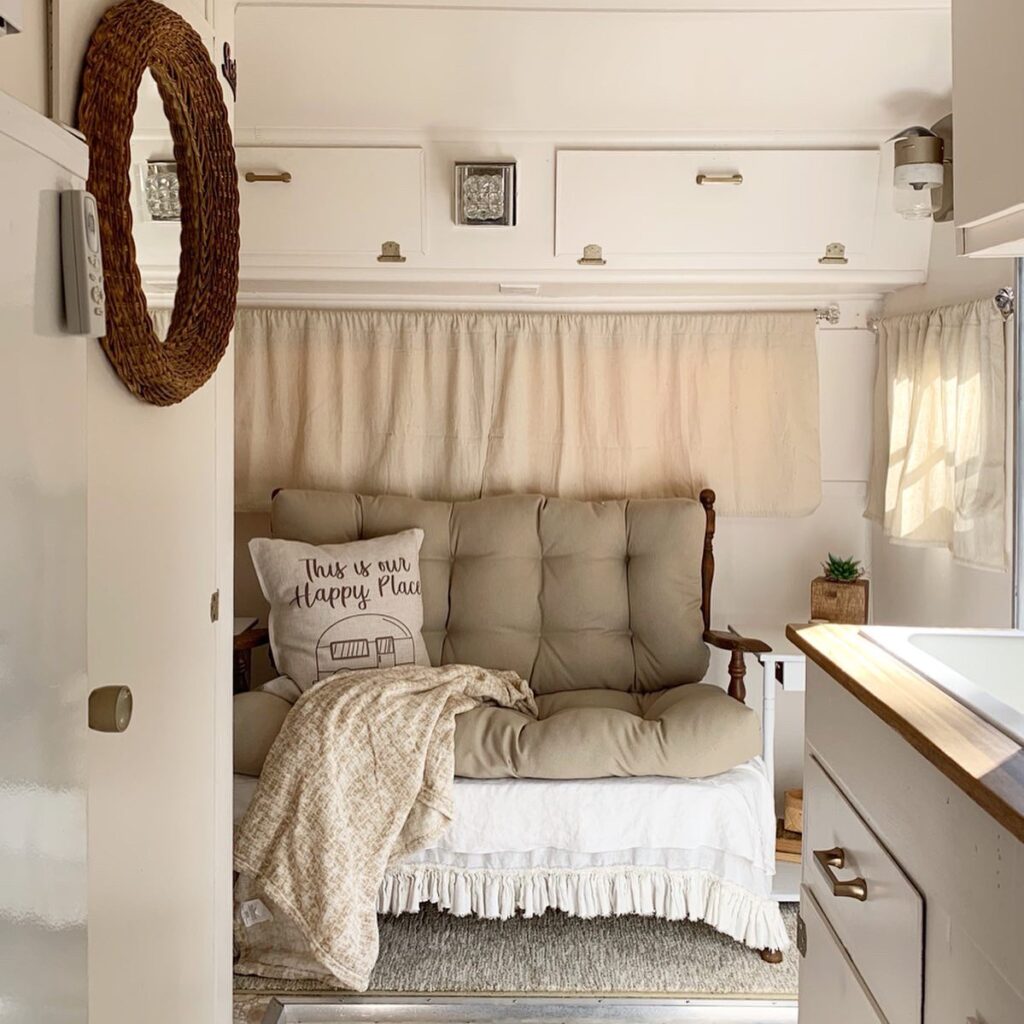
The cabinets over the sofa area got the same hardware as the kitchen cabinet. For curtains, I asked my mom to make some out of drop cloths I purchased at Walmart. The neutral fabric is perfect for the space. I thrifted old linens to act as a bedskirt on the vintage sofa. Topped with bench cushions from Amazon, a plush throw, and a pillow from Bonnie’s Homestead Prints , and the sitting area was instantly cozy.

I found these adorable rugs from the At Home store.
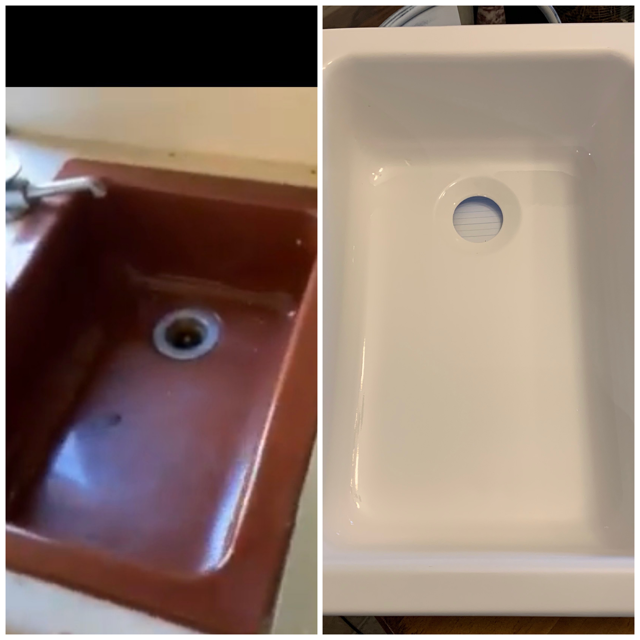
The original sink was still in the camper, but we chose to spray it with white appliance epoxy paint by Rust-Oleum, just like we did on the refrigerator.
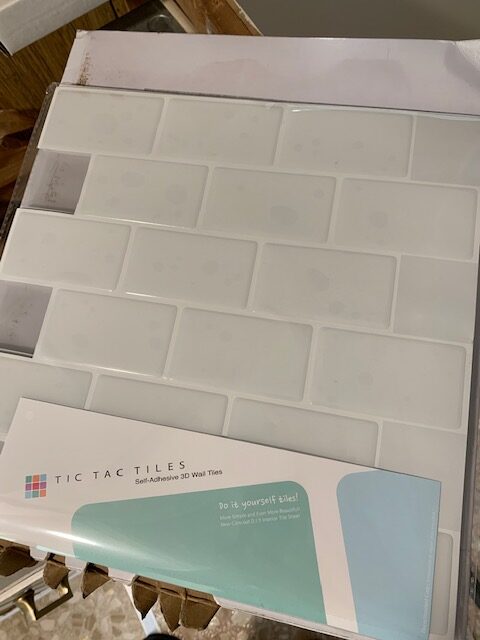
For the backsplash area, I purchased these peel and stick tiles from Wayfair.
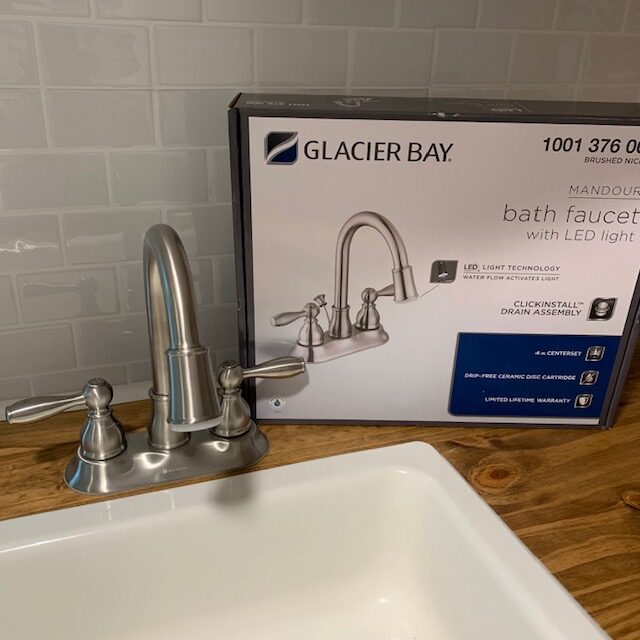
A new faucet was also necessary. I wanted something with a “goose neck”, but it also had to be small for this tiny space. Luckily, I found the perfect one at Home Depot.
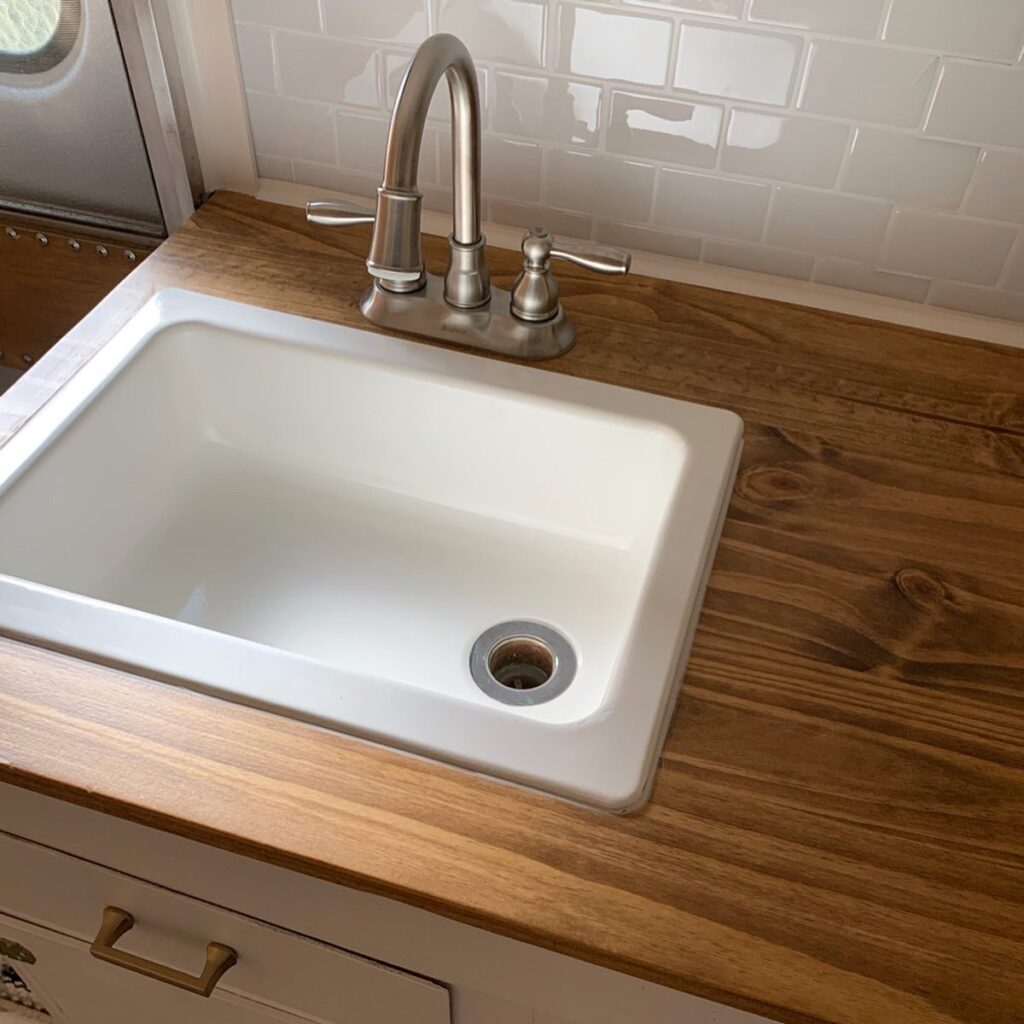
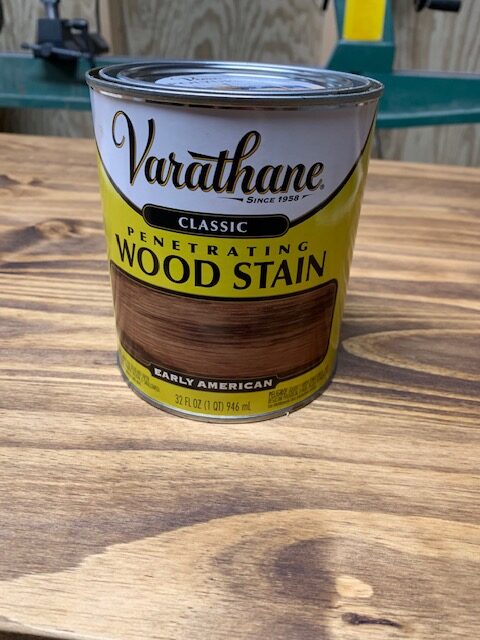
Mister made a new wood counter. We stained and sealed it and this kitchen area could not be more perfect.
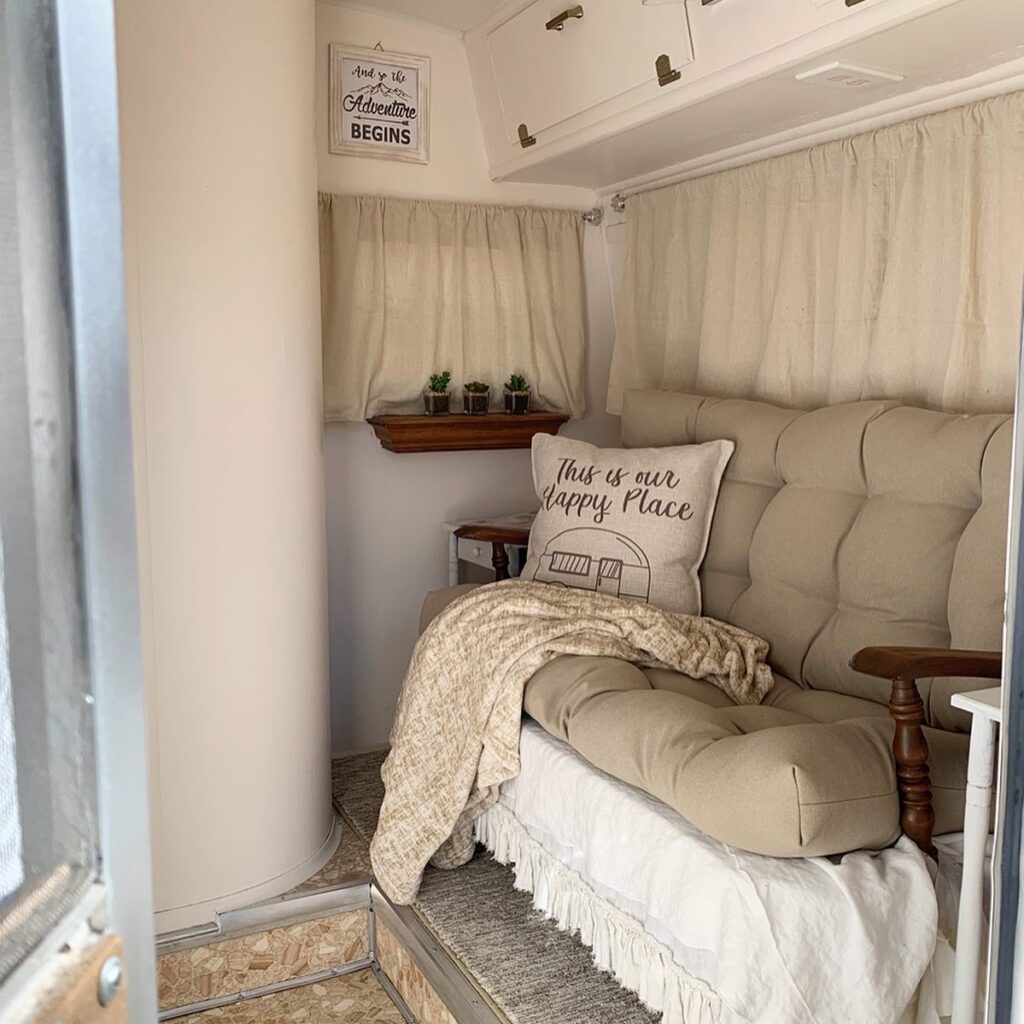
I found two small matching end tables at a thrift store. I painted them to match and they were the perfect fit on each side of the sofa. We also added a tiny shelf under one window for a little more character.
The previous owner had built a twin bed frame on one end of the camper. So we just added to it to make it almost a full size bed. The part we added also lifts up for more storage options.
The bed skirt was thrifted vintage linens as well. I purchased a light gray down comforter and cream colored bed sheets to give the bed a comfy, neutral look.
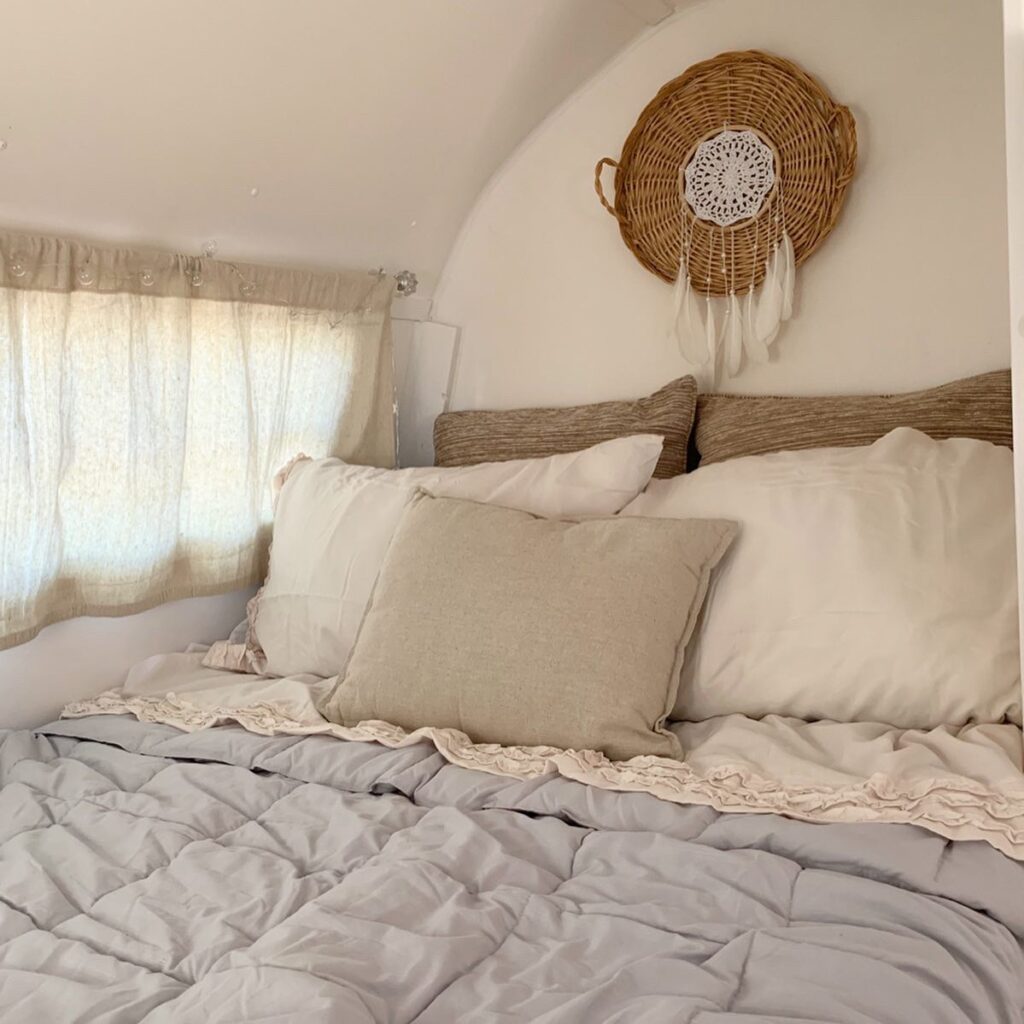
The ruffled sheet set and pillow cases were purchased from Ollie’s for a great price. I added more throw pillows I had on hand, fairy lights above the curtains, and a basket/dream catcher on the wall for more bohemian charm.

If you look on the wall beside the door, you can see the original gas lantern for the camper. We found it in a cabinet when we purchased it. We won’t be using it of course, but I painted it to match the space and we hung it up for a conversation piece.
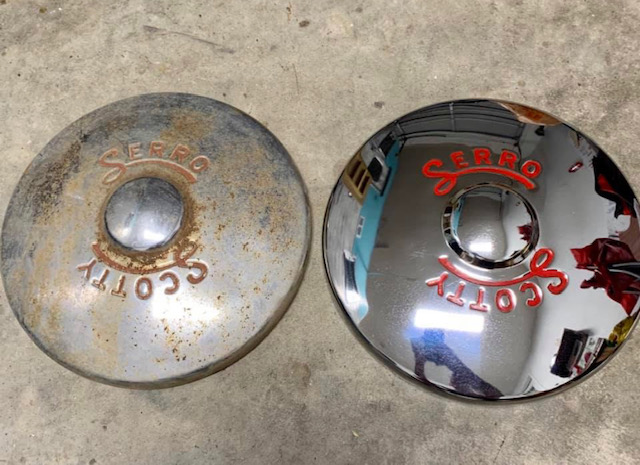
Look at the difference in the original hubcaps after Mister cleaned them up and repainted!
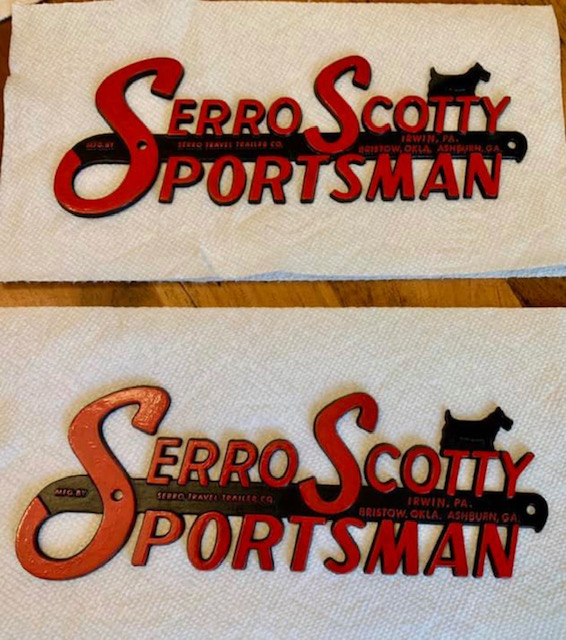
He also repainted the logo emblems the original colors.
And here she is! We named her Rhonda, after the lady we purchased her from. We are so thrilled with how she turned out and look forward to all the camping adventures we will have with her. Mister is currently restoring a vintage truck that will make pulling this little vintage lady even more fun!
Pin this image for later and come pin along with me HERE.
What kind of toliet is this? I have a 1970 Scotty Hilander and would like to replace mine. Thanks ????
Hey! It’s a Thetford from etrailer.com
This is awesome. I’ve not looked at the finished pictures til now. I always wonder with older vintage things all the memories inside them. Love y’all and I always say I want to be like y’all when I grown up!????????
Awe, you’re the sweetest! Thank you so much! You know we love to have fun 🙂
Love what you’ve done with the camper! Can you tell me what kind of air conditioner you installed, and where? I don’t find it in the pictures. Thanks!
Hey! Thank you so much 🙂 We used a 5000 BTU unit. We made a shelf for it in the top of the closet area where the refrigerator already was. There is a line attached to the drip pan that runs out of the bottom of the camper for draining. There’s a vent directly behind it in the wall for exhaust. And we also put one on the side of the closet area for air intake.
Hope that helps!
The hubcaps look amazing! What kind of paint did he use on them? They look like they are polished aluminum or chrome. Great job!
Thank you! It’s polished chrome and we used red Rust-Oleum acrylic paint and hand painted letters with a brush.
Hi. It has been three years since this post. Wondering if the exterior paint on camper has peeled? I primed and painted with oil tractor paint and it peeled after a few years.
We just noticed a couple of small places where that’s trying to happen. Not sure if it’s due to that side of the camper being exposed to sun?
Thank you for seeing the value and restoring your Serro Scotty trailer! My parents owned 6 models from 13 foot to 22 foot. I never see the larger ones online. Guess because they don’t look vintage! As a little boy, we hauled it every weekend to Scottyland Campground in Rockwood, PA. Great memories!
We love our little “Rhonda” and are making so many great memories with her 🙂
Hi , We are in the process of restoring a 1967 Scotty (second one). I noticed that you removed the bankett and placed a vintage settee there along with two end tables (which I love! My question is does this interfere with the integrity of the camper? Meaning I thought the bankett helped sturdy and brace for the walls.
I’ve not heard that before, but we haven’t had any issues at all doing that. It’s been great to have a different type of sitting area as well.
Just brought home a 1969 Scotty and hope we can get it looking as good as yours does! How did you go about tearing out and replacing the ceiling? Ours has some old water damage, but I’m nervous about how difficult it will be to replace.
Thank you so much! We tore out the old luan and replaced it with new luan. It was easy to work with because you can bend it so easily. We used the white color and painted lattice strips white to trim it out. Good luck with your project! I’d love to see pictures!
Awesome! I just bought a 1968 Scorty Sero I’m going to redo. I bought e new Thetford rv toilet off an auction for 5 bucks, I hope it will work with mine!
I know it’s been awhile since your Scotty rebuild. Would you like to sell it, or, are you still enjoying it? Can’t help but to ask. 😉
We actually sold it last spring. We have a grandbaby now and needed to upgrade. Sorry I’m just seeing your message.